The slideshow tool makes it easy. The simple format gives you polished, video-style results that load fast and look great on any device.
If you’re worried about your slideshow turning into a freakshow, we’ve prepared this step-by-step guide on how to make a photo slideshow on Facebook — fast.
We’ll show you how to use Facebook’s own Slideshow Ads feature to create affordable ads from photos and videos you already have, and how to create a basic photo slideshow from your Facebook page.
It’s quick, simple, and stress-free to make a slideshow from scratch using your own media, but you can also use one of Biteable’s specially designed templates to create a slideshow with Spielberg-level flair.
Making a Biteable template for your Facebook slideshow
At Biteable, we’ve made it simple for anyone to create professional slideshows. Even if you’re a total newbie to the world of video and animation, you can get expert results in a matter of minutes.
Getting started
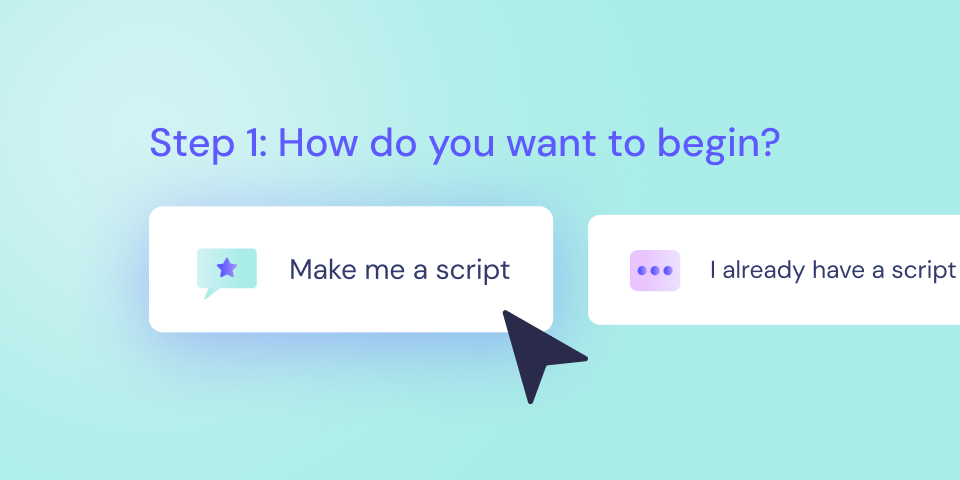
Go to our website and click on ‘Make a slideshow’.

You’ll be prompted to log in (if you haven’t already), then you’ll be taken to the slideshow video template library. This will be updated regularly with new templates.
We’ve taken all the guesswork (and hard work) out of making your slideshow. All you need to do is make a few quick edits to personalize your video.
Our templates let you edit as much or as little as you like. Change a word here or an image there. Or go all-out and add extra scenes, text, photos, and videos to your template to create something even more spectacular. It’s up to you.
Every template is designed by our team to give you eye-popping images, effects, and colors that are typically achievable only with complex editing software and a big budget.
Customizing your Biteable template
Hover over any of the template images and click the play arrow to preview each slideshow. When you’ve chosen the one that’s right for you, click on the ‘Edit Video’ button to start creating.


This will take you to the Biteable editor. The clear layout and intuitive design of our editing tool makes it simple for you to change images, text, font, color, and timing per slide of each individual scene.
From this dashboard, you can upload your own logo, photos, or videos to include in your slideshow. You can also add audio from our selection of royalty-free tracks at the ‘Audio’ step at the top of the editor.
- Note
If you’re planning to use your template to create a Facebook ad using Ads Manager, you can skip adding audio at this point. You’ll get the opportunity to add music to your slideshow when you’re in the Facebook platform.
Once you’re happy with your finished slideshow template, it’s time to preview it and get it ready to save to your desktop.
Click the green ‘Preview Video’ button in the top menu and Biteable will build your slideshow video while you wait.
After you’ve watched the preview, you can choose to publish your video or go back and edit things as many times as you need to. Once your changes are made, build a preview again and then publish your video to Facebook.
If you’re a Biteable Premium member, you can remove the watermark and download your slideshow video to your desktop, and then upload to Facebook from there if you prefer.
You’ve now got a magnificent slideshow you can use to tell the world about your brand. One of the most popular ways to do this is with Facebook Ads.
How to make a slideshow with Facebook Ads Manager
Facebook Slideshow Ads are fast and inexpensive to create. Videos made the usual way (e.g. by hiring a video editor or signing up for software like Adobe Premiere) can be time-consuming and expensive.
The Facebook Slideshow feature allows you to showcase your brand in an ad with all the emotion and visual impact of video, but in a more cost-effective and lightweight format.
Getting started
Open up your Facebook Ads Manager and click the green ‘+ Create’ button.

First you’ll need to choose the objectives that will help you reach your ad goals. Slideshow is available in all objectives, whether you want to run your ad on Instagram, focus on traffic, conversions, or get video views.

Next you’ll need to click up a frenzy as you decide on your campaign and ad set details, targeting, budget, and scheduling information. Once you’re done, create a campaign name and click ‘Continue’.

You should now be in the Format section, where (since you’ve already read this far) you’ll want to check the ‘Slideshow’ box and then ‘Create Slideshow’.

You’ll be transported to the ‘Video Creation Kit’ window where you’ll check the ‘Create Slideshow’ box and then ‘Continue’.

This will now pop up the main settings box. You’ll see options to choose your aspect ratio, select the display duration for each image, and pick a transition effect for your slideshow. This is where you’ll start building your slideshow from either still photos or a video.

How to make a Facebook Slideshow Ad from a video
This is a great time to take your shiny new Biteable slideshow for a spin.
Make sure your aspect ratio is correct for any video you decide to use. Your Biteable video needs to be set to a 16:9 ratio so it doesn’t get cropped into a square. You can click back to the ‘Video settings’ menu to preview the aspect ratio of your video at any time if you’re not sure.
Once your video uploads to Facebook, it will split into still frames that seamlessly displays your ad in a slideshow format.
From here you can select as many frames as you like to create your slideshow. It’s easy to make sure they’re in the right sequence by clicking on the stills from top to bottom to add them to the timeline.
You can preview your slideshow at any point using the pane on the top right-hand side to see how it’ll look when it’s published.
In the timeline you’ll notice a tiny pencil icon on each image. Clicking this allows you to add captions to each still. You can choose the font, color, and position of the captions for each frame. Once you’re done, click ‘Save’.
How to make a Facebook Slideshow Ad from photos
From the main settings box, instead of selecting video, click ‘Add Photos’. This will pop up a box where you can choose up to 10 photos from your account images, stock images, page images, or from your saved photos.
Your images should all have the same dimensions if possible, to avoid cropping.

Once you’ve chosen your photos, click the blue ‘Confirm’ button and Facebook will populate the settings box with your uploaded photos.
The photos will display in your slideshow in the order they appear on the timeline. If you got things wrong, you can delete and re-upload your images. You can check your progress in the preview pane at any time as you work.

Clicking the pencil icon in the timeline for each image lets you add in text captions to your photos. You can also move around the settings box and make adjustments to your aspect ratio, image duration, and transition effects.
How to make a Facebook Slideshow Ad with music
The settings box has an optional feature that allows you to add an audio element to your slideshow. Facebook supports WAV, MP3, M4A, FLAC and OGG formats.
Click the ‘Music’ button and you’ll see a list of available tracks. There’s also an option to upload your own track — just make sure you’re legally allowed to use it first.

Uploading and publishing your Facebook Slideshow Ad
Give your slideshow a final preview (or two) and make sure it’s all ready to go. Click the blue ‘Create Slideshow’ button at the bottom right of the settings box and your slideshow will begin its uploading journey to Ads Manager.
Your upload will take between 30 seconds to 2 minutes depending on your connection speed. Grab a coffee, ponder the universe, and it will be ready before you know it.
You’ll now find yourself back in the main Ads Manager dashboard where you’ll be given the option to add a few final customizations to your video. You can select the main thumbnail to display in your ad and upload captions if you need to.

Add your ad text, call to action, and placement details. Then scroll to the bottom right hand corner and click the green ‘Confirm’ button. This will publish and activate your ad campaign — you’re done!
Creating a basic slideshow for your Facebook page
If you don’t want to use our Biteable templates (it’s okay, we can still be friends) and you don’t want to make a Facebook ad, you can also create a slideshow from photos using the basic tool built into the Facebook platform.
From here you can build a simple slideshow up to 50 seconds in length to post on your page. It won’t have as much wow factor as the Biteable templates, but it’s still a great way for you to create a Facebook video.
Go to your Facebook page on your desktop and get ready to write a new post.
- Note
You can’t make a slideshow on your Facebook profile page, it has to be a Facebook page that you manage. If you’re confused at this point, navigate to one of your pages on Facebook and start from there, or create a new page for your fans to follow if you don’t have this set up.
Select the ‘Photo/Video’ option on your post creation module.

Once you’ve clicked this button, a dropdown will appear with more photo and video options to choose from. You’ll want to select ‘Create Slideshow’.

A pop-up box will appear, giving you settings options for your slideshow. You can now start uploading photos from your gallery or taking new photos to add to your slideshow.

The settings allow you to select your:
Aspect ratios
- Square (1:1)
- Rectangle (16:9)
- Vertical (2:3)
Image duration
- Between 1 and 5 seconds per photo
Transition styles
- None — each photo moves straight to the next photo
- Fade — inserts a fade effect between each photo
If you’re not sure about any of the above options, it’s okay. You can play around with these settings while you preview and edit your slideshow in this window at any time before you publish it to see how it looks.
Now for the fun part — uploading photos to start making your slideshow.
Uploading photos to create your Facebook slideshow
Make sure you upload your photos in the order you want them to appear on the slideshow when it plays. You can use a minimum of 3 and maximum of 10 photos as part of your video.
You can replace and delete photos as you go, but you’ll need to delete all of the photos back to the point of the first photo you want to change. Then you’ll need to upload everything again from there. It’s a bit annoying, but doesn’t take too long (we promise).

Clicking the ‘+’ sign in the photo timeline will allow you to add new photos until you reach the maximum of 10.
In the top right corner of this settings box, you can click on the white arrow in the preview pane to see exactly how your slideshow will look when it’s published.
You can keep changing photos, adjusting the settings, and previewing your slideshow until it’s exactly how you want it.
Making a Facebook slideshow with music
Want to add music to your slideshow to make it even more amazing? Simply stay in the same settings box and click the ‘Music’ tab.
This will drop down a range of different tracks for you to choose from. You’ll notice a row of emojis above the track listing. These give you options to select recent tracks or to choose a certain theme for your music (e.g. inspirational, fun, modern).

All Facebook’s tracks are free to use. You’ll notice there’s also an option to upload your own music. If you’re going to add your own music, make sure you have the right to use it first. A copyright infringement fine will take all the enjoyment out of creating your first slideshow.
Posting your slideshow to Facebook
Is your preview looking good? If so, it’s time to publish.
Remember, once you’ve published your video, you can’t go back and edit it, so now’s a good time to give it one last preview!
All you have to do is click the blue ‘Create Slideshow’ button.

This will pop up yet another window (thanks, Facebook…) with the magic button you’ve been waiting for: ‘Publish’.

Your slideshow will take a few moments to upload before you can view it, so don’t panic that it hasn’t shown up immediately. Have a stretch. Grab a snack. You’ve earned it.
Once the upload is complete, you’ll get a screen notification from Facebook that your slideshow is ready to watch. If you love your video creation and want the world to love it too, you can pay to promote your slideshow by clicking the ‘Boost Post’ button.

So there you have it. The fastest, easiest ways to create professional slideshows on Facebook, whether you’re using them to advertise your business or just to brighten up your page. Now go forth and create!