The Screen Recording tool is great for walking viewers through a tutorial on your device, or demonstrating a game or app — and you can even record with voiceover, if you’d like.
Here’s how to activate this new feature, and how to use it.
How to Enable Screen Recording
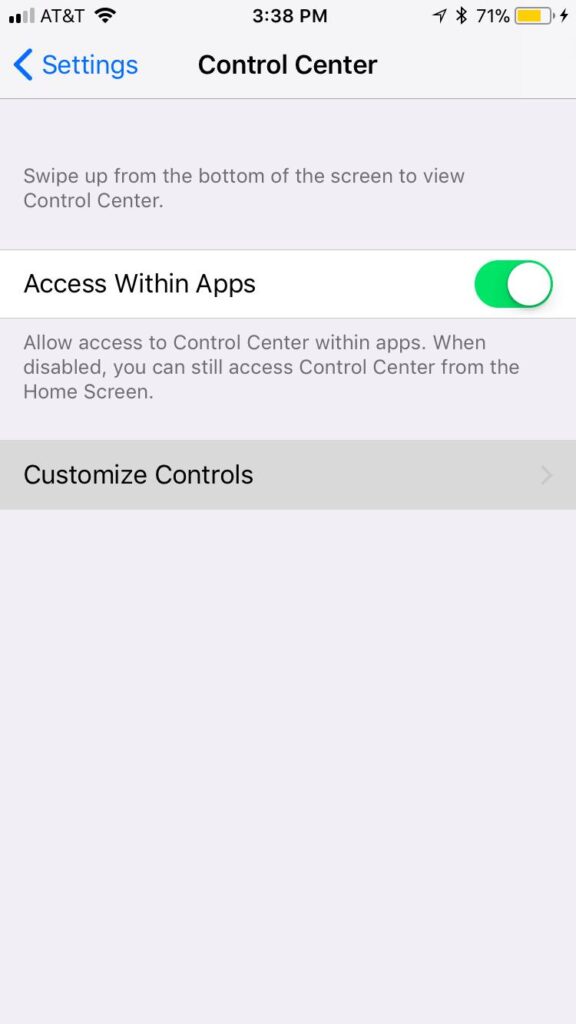
If you’ve just updated to iOS 11, you won’t immediately see the option to turn on Screen Recording. You’ll first need to enable it. You can do this by going to Settings > Control Center > Customize Controls.
1. Settings
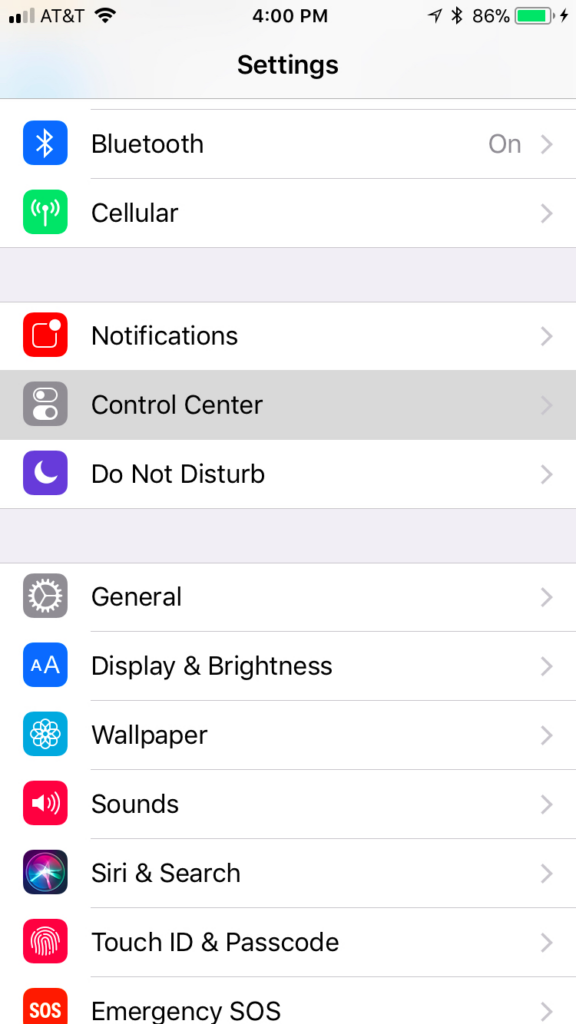
2. Control Center
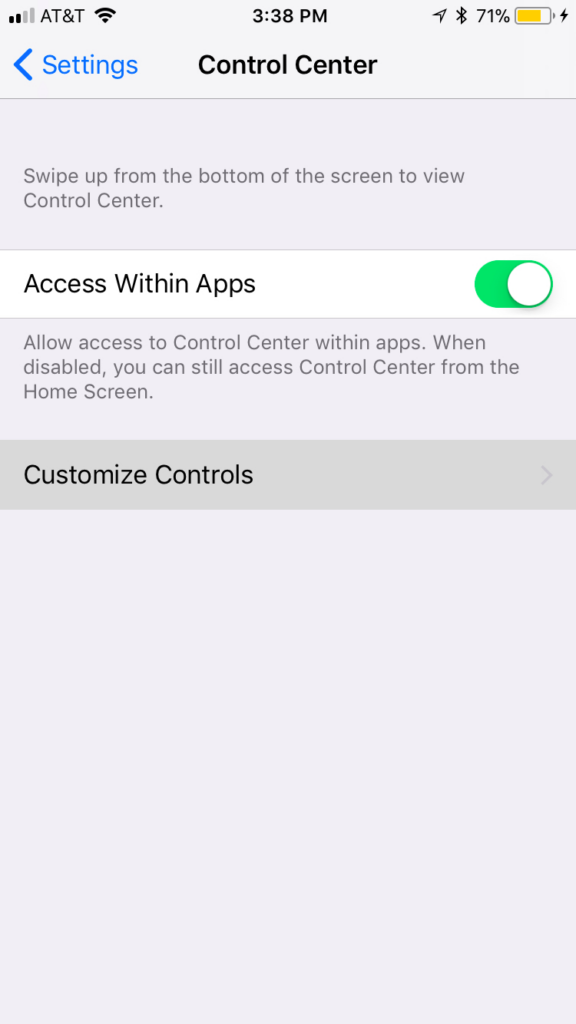
3. Customize Controls
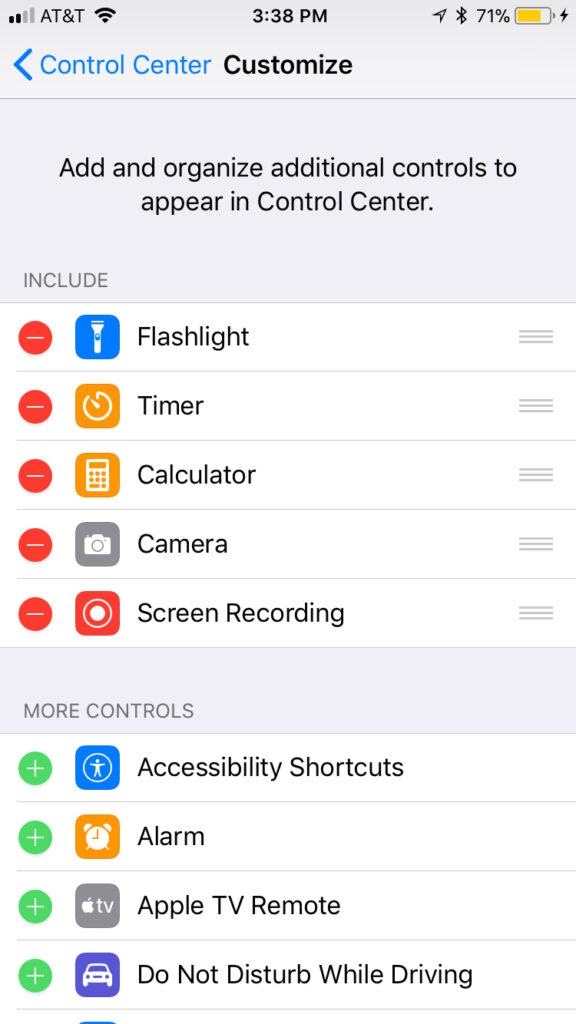
Now scroll down to Screen Recording and tap the green + sign to add it to the Include section.
This will add it to the redesigned Control Center, where you can quickly access it by swiping up from the bottom of your screen.
Starting a Screen Recording
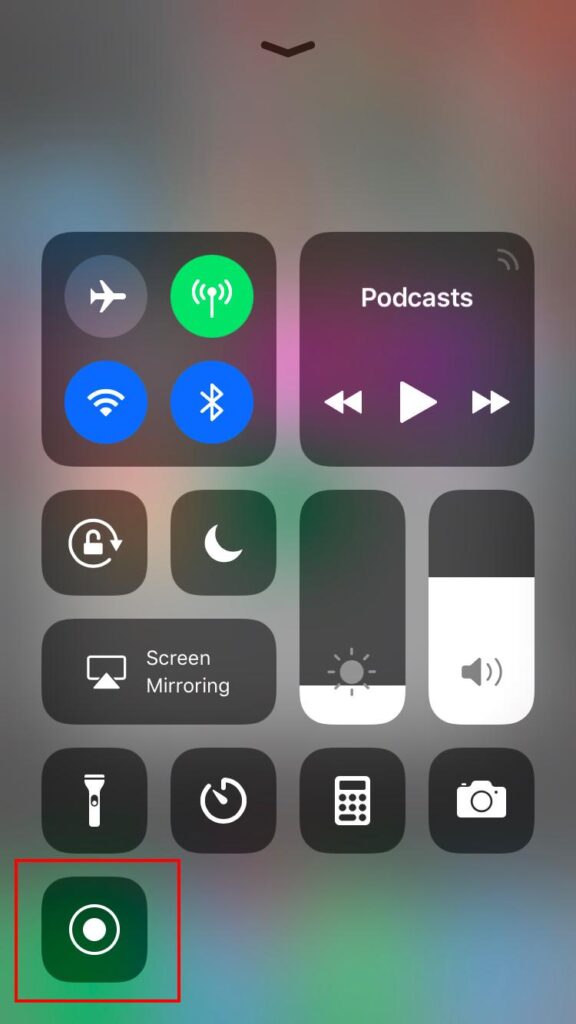
Swipe up to access your Control Center. You should now see a record symbol (two concentric circles.)
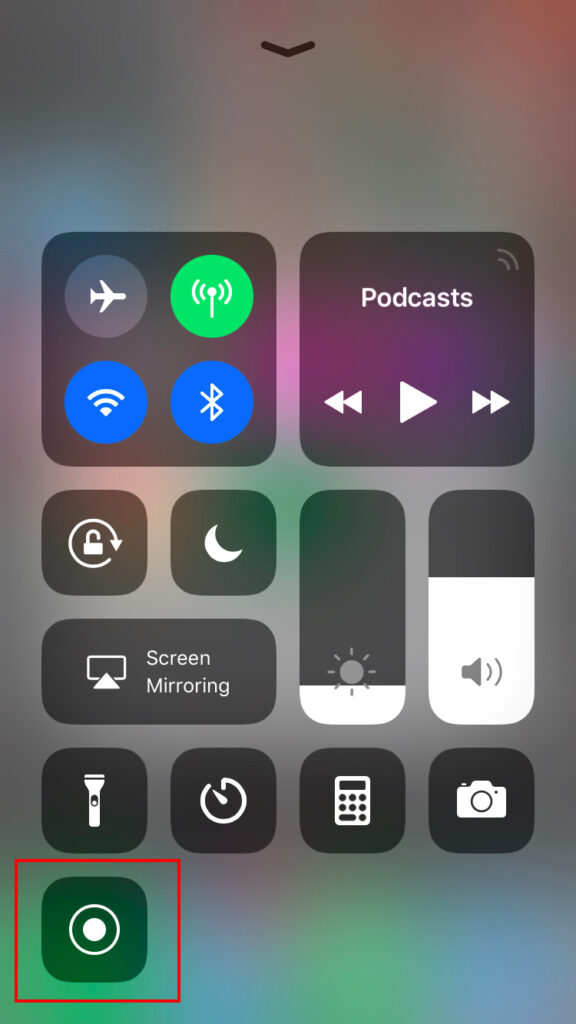
To quickly start a screen recording without audio, tap this button once. The button will count down from 3, before beginning your recording. You can now enter any other app and use your phone as you normally would.
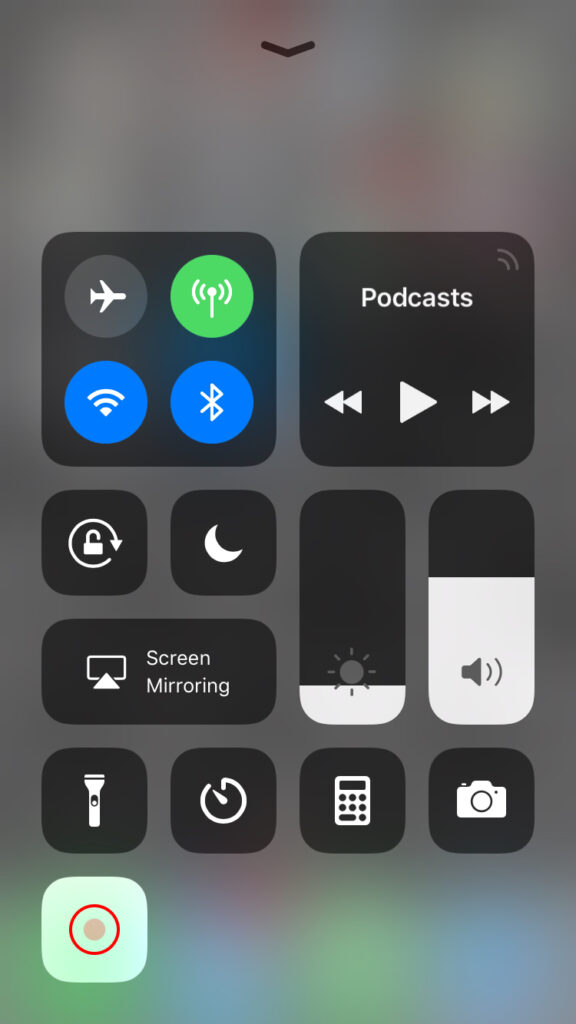
While recording, you’ll see a red bar at the top of the screen, and a red recording icon in Control Center.
Screen Recording with Audio
By default, the Screen Recording tool records without sound. If you’d like to record with audio, you can turn on the microphone by going to the Control Center and either hard-pressing the recording icon (if you have a device with 3D-Touch) or using a long press (if you don’t.)
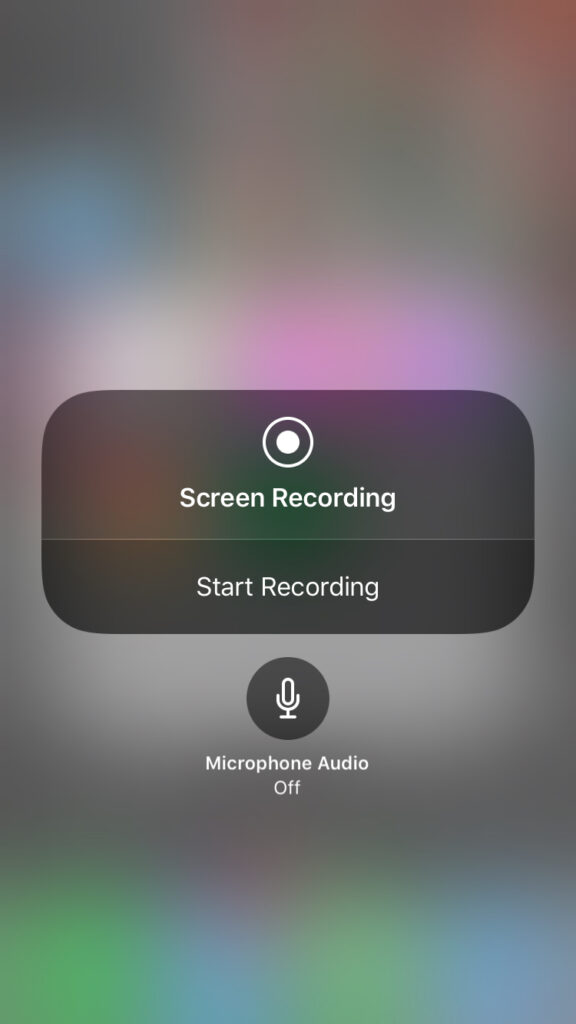
This will bring up the screen above where you can turn on your microphone and start recording.
Note that once you turn on audio from this screen, the microphone will stay on when you create subsequent screen recordings. If you don’t want audio, make sure to check whether the mic is on (and turn it on or off) by hard-pressing again.
Ending a Screen Recording
When you’ve finished your video, you have two ways to stop recording. The first is by tapping the red bar at the top of the screen. A dialog box will pop up, asking if you’d like to stop recording.
The second way to stop your video is to enter Control Center by swiping up, and tapping the red recording icon again.
Accessing Your Recordings
Once you stop recording, a dialog box will tell you that your recording has been saved to Photos.
Open the Photos App to find the video saved to your Camera Roll with all your regular photos and videos. Here you’ll find all the same options for viewing, sharing, and editing that you normally have when you record a video with the Camera app.
And that’s all there is to it! Happy recording!
