Screen recording isn’t just for video game streamers. Recording your screen is amazing for creating instructional visuals, recording professional presentations, or making YouTube videos that get more views and engagement.
Unfortunately, instructions for how to screen record on PC, Mac, or other devices aren’t widely published. The good news is that, with Biteable’s Record tools, it’s super simple.
Screen recording is a fast and easy way to produce quality, informative footage. Let that footage stand as is, or level up by adding a video frame, animated text, and effects. With the press of a button, you have yourself a compelling video your audience won’t want to miss.
We cover all of this in our step-by-step guide to recording your screen on any device.
Why use screen recording videos
Screen recording is the fastest, easiest way to create visuals and use those visuals to help your audience understand and remember what you’re talking about.
Video gets attention and helps viewers retain information better. Additionally, video delivers large and small snippets of information faster than text.
Screen recording helps you record instructional videos, presentations, and even video marketing content in one swift take, without even turning on your camera. Do a little trimming and editing (with Biteable, of course) and you’re ready to go with engaging and informative videos.
Create videos that drive action
Activate your audience with impactful, on-brand videos. Create them simply and collaboratively with Biteable.
How to screen record with Biteable
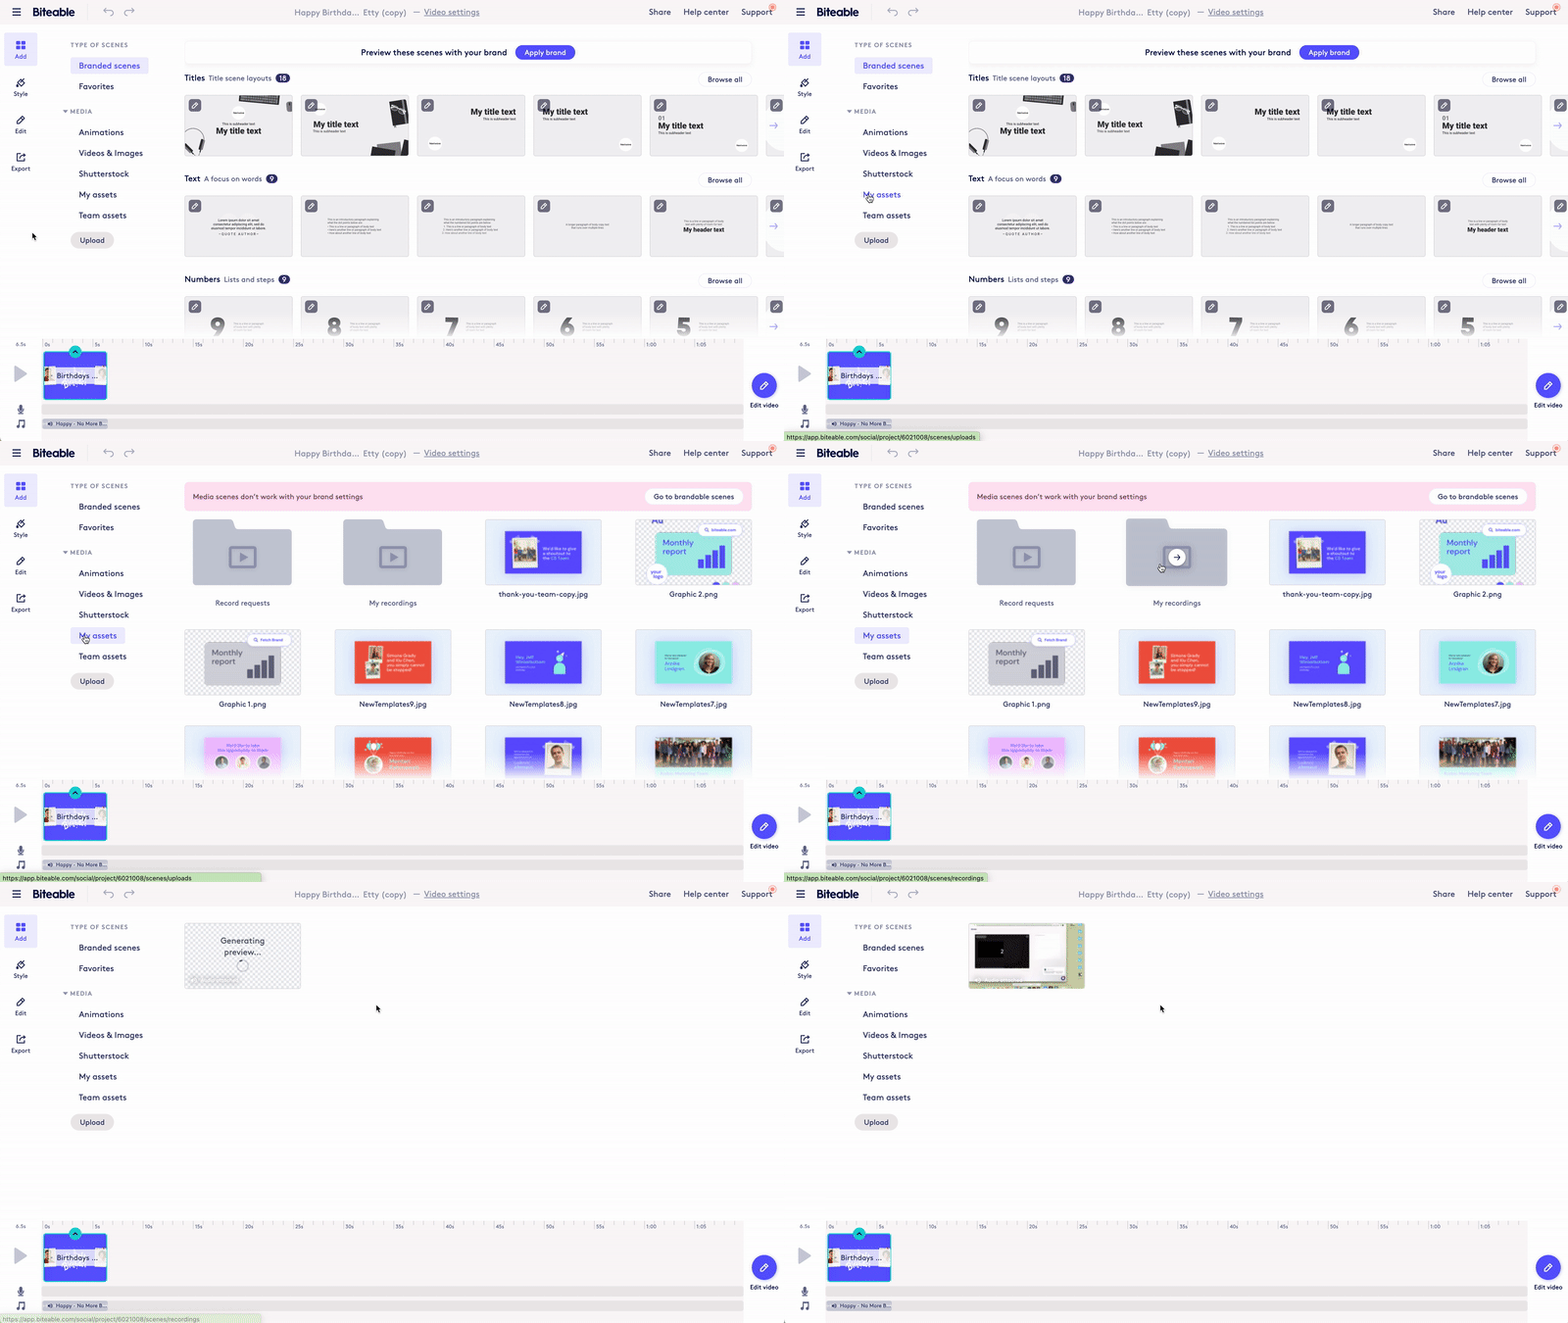
Screen recording tools are built in to Biteable. You can record, review, trim, and publish your screen recorded video from within the Biteable platform. Here’s how:
1. Log in to your Biteable account or sign up for a free trial.
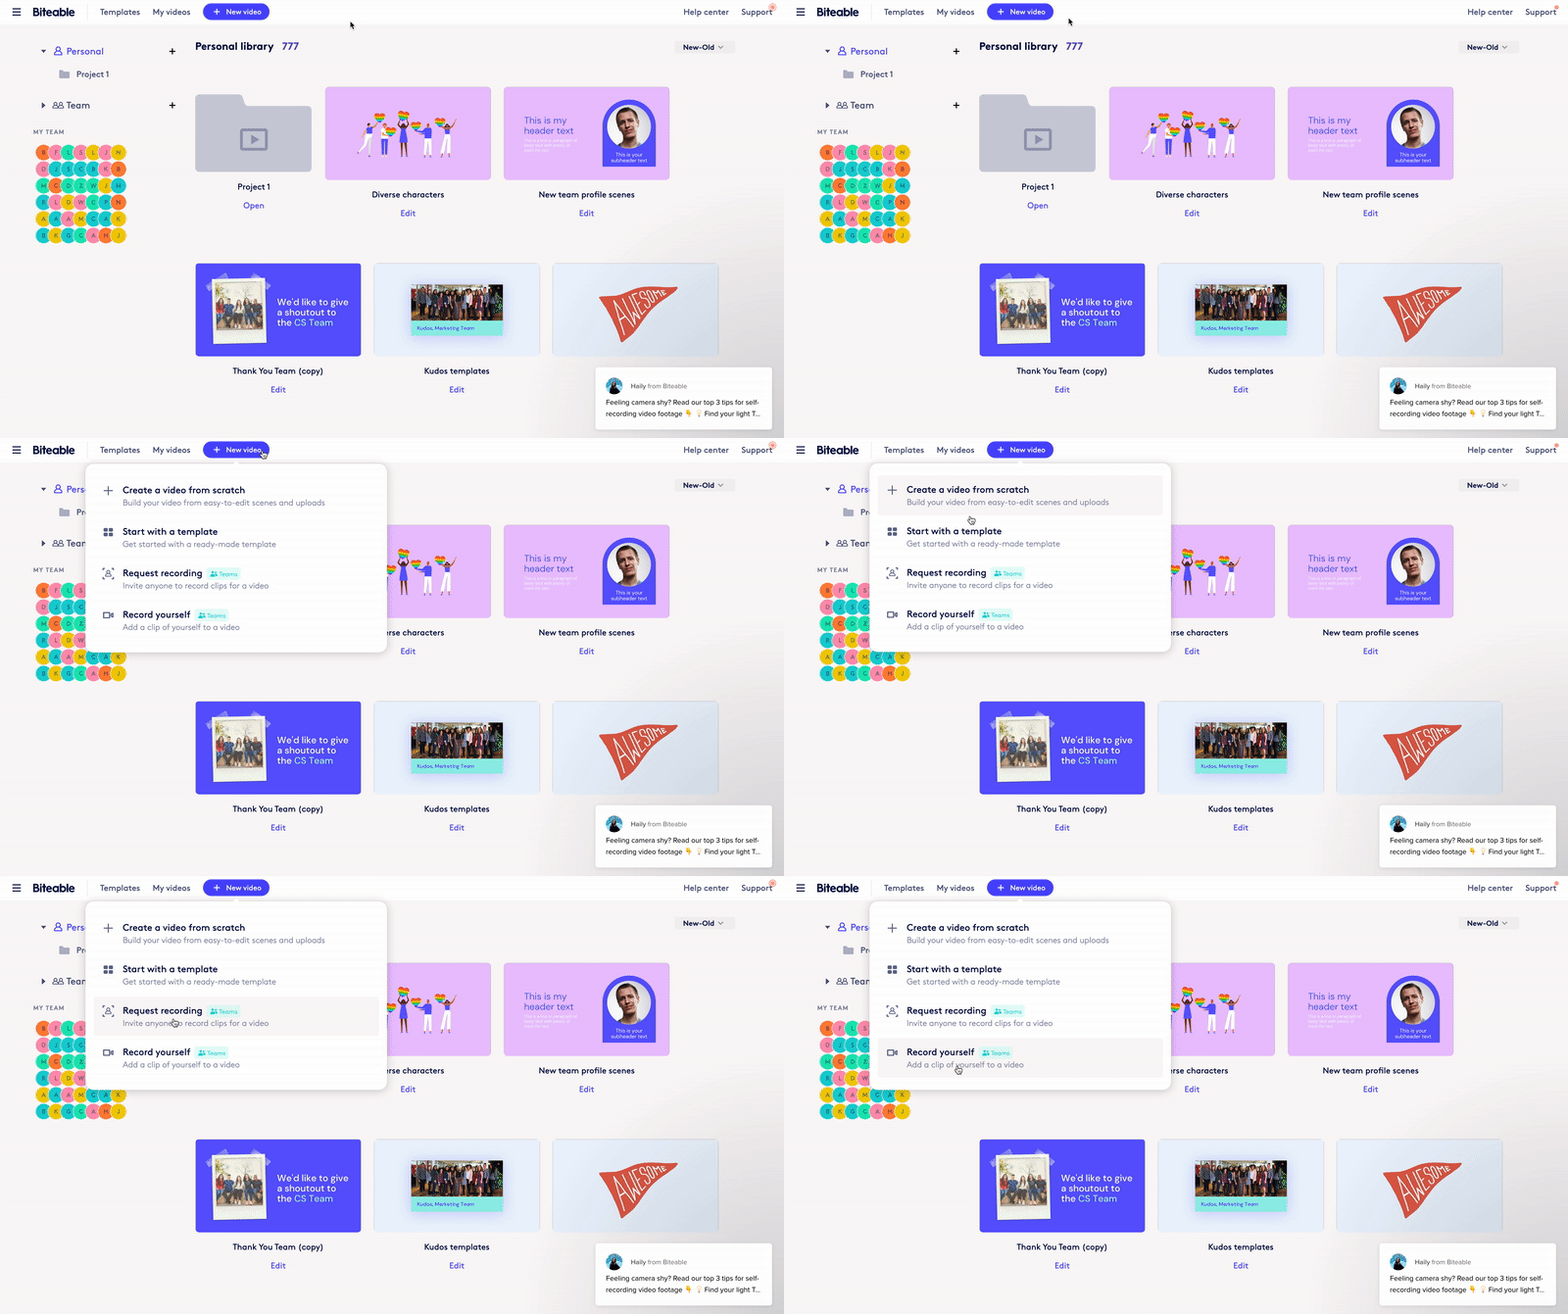
2. Click the ”+ New video” button in the header, then ”Record yourself”.
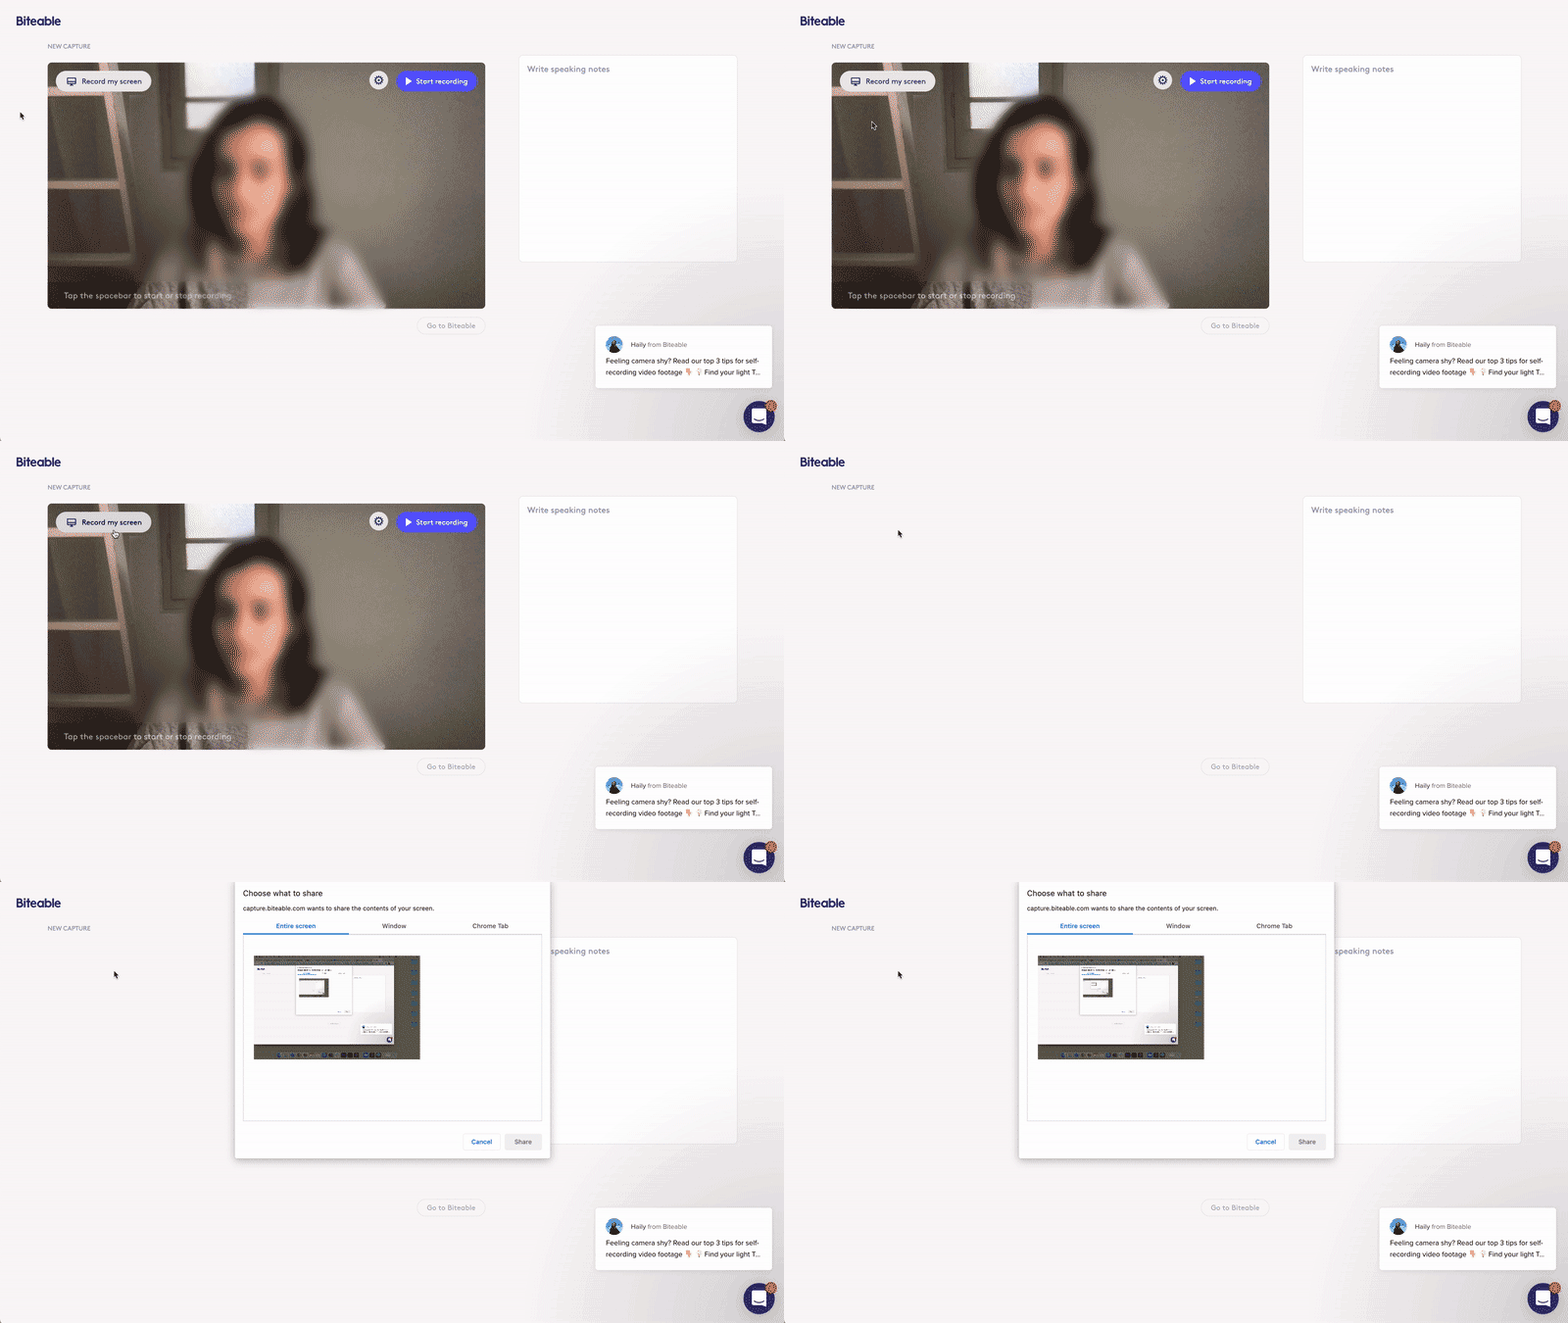
3. Hit the ”Record my screen” button and choose which screen you’d like to record
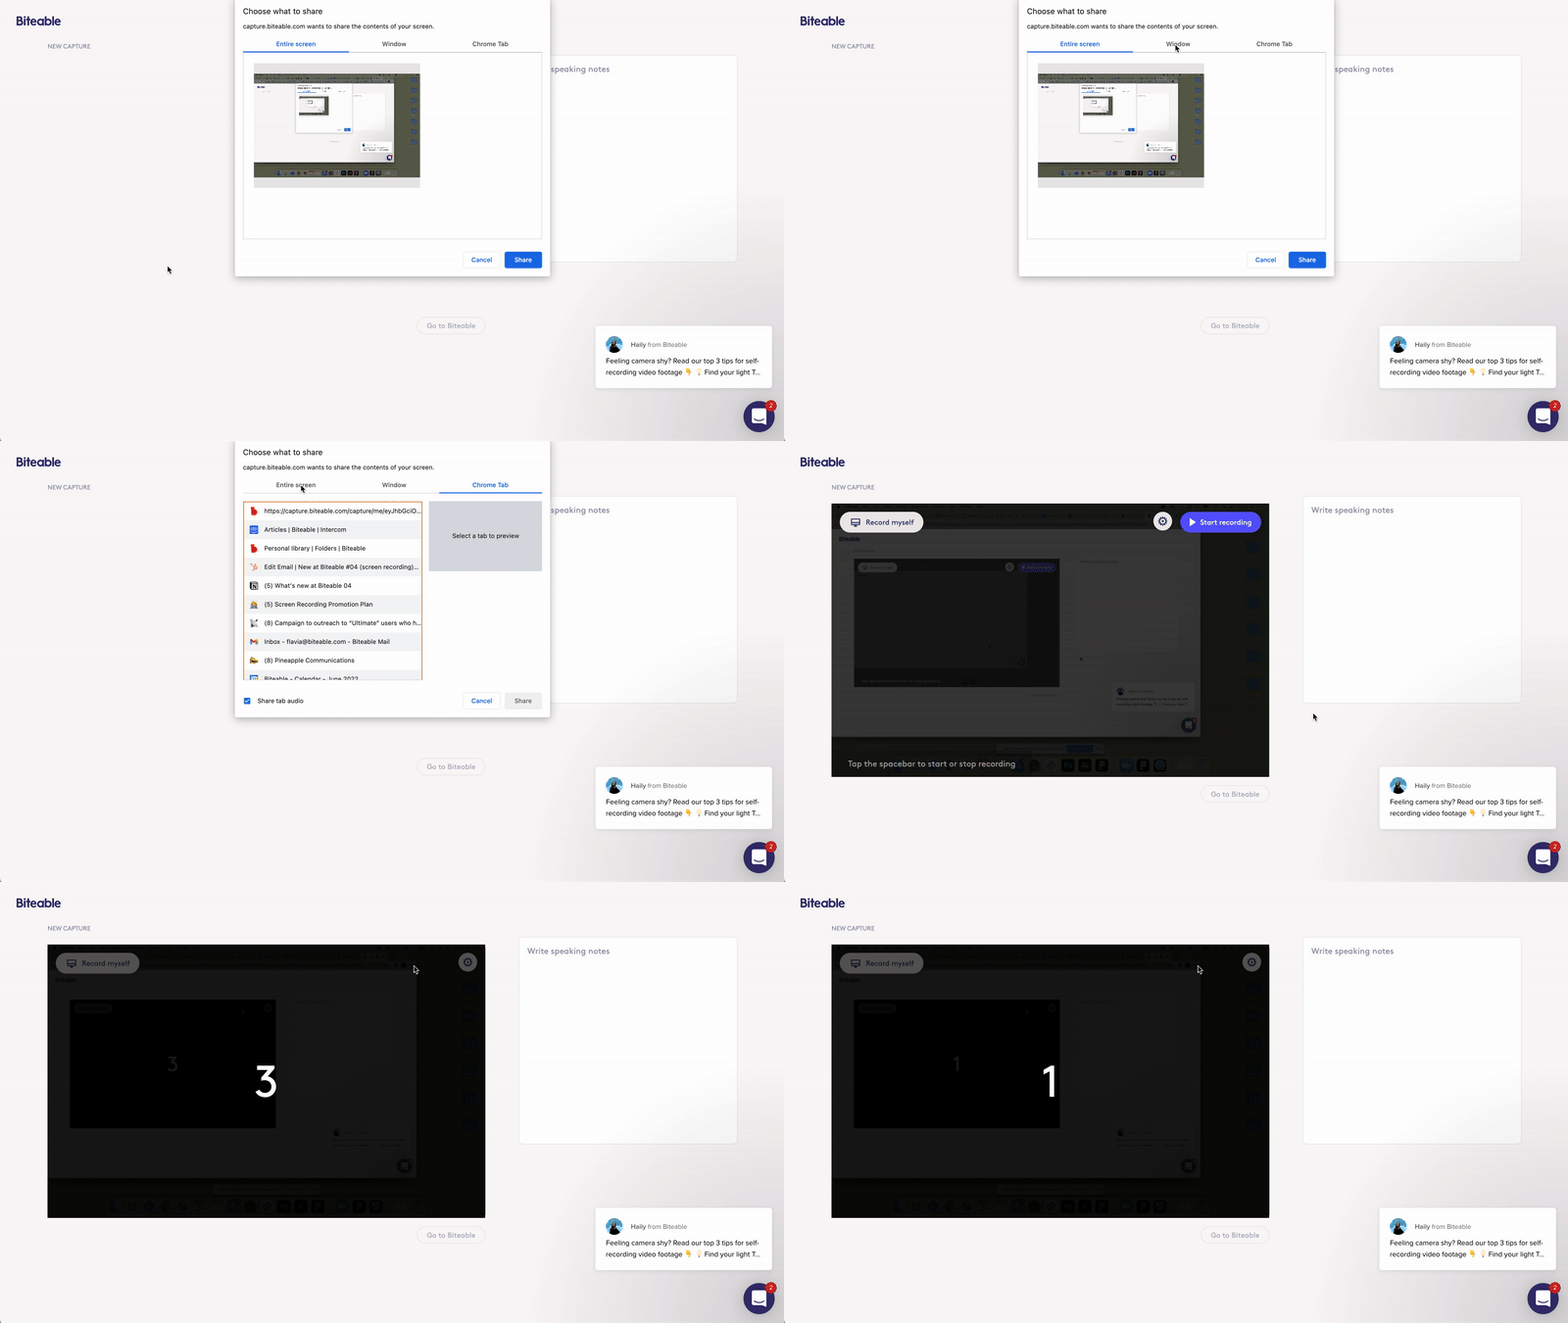
4. Select ”Start recording” to capture your screen
5. When you’re finished recording, click ”Stop recording” to review and save your footage
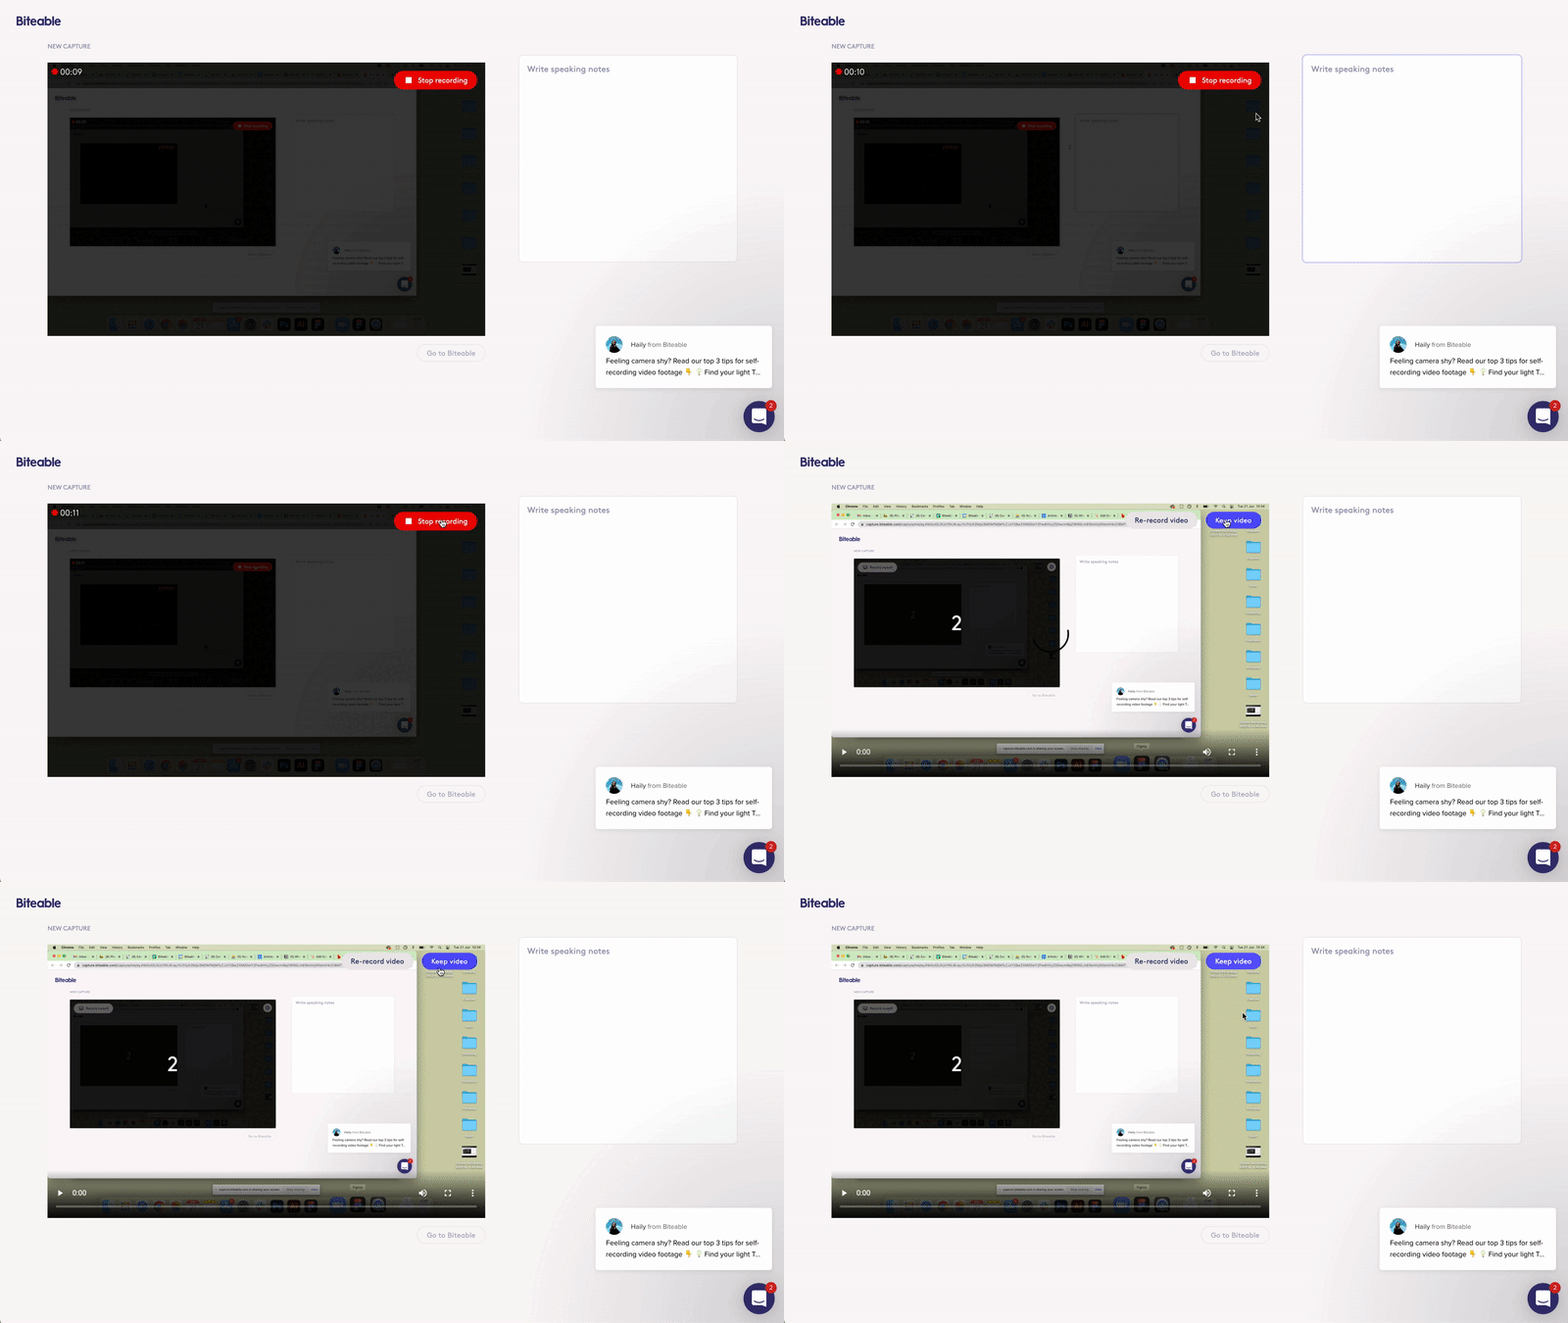
6. Your screen recordings are saved in the Biteable editor, ready to add into any video
Pro tip: Use Biteable’s Record Request tool to invite someone else to record their screen for your video. Contributors receive an easy link via email (plus all the relevant project info), and their final footage is saved directly into your Biteable account.
How to record yourself and your screen
Whether you’re creating a tutorial, a presentation, or a video resume, recording your screen and yourself simultaneously can add a personal touch and make your content more engaging. It’s easy to do with Biteable.
1. Follow the same steps as above to start a new recording in Biteable
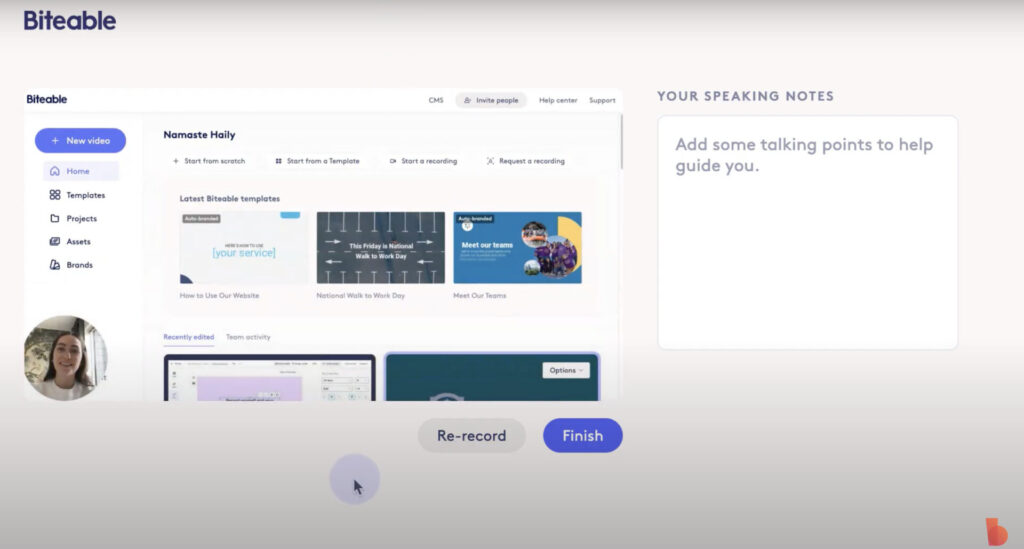
2. Choose the record myself and my screen option before pressing record
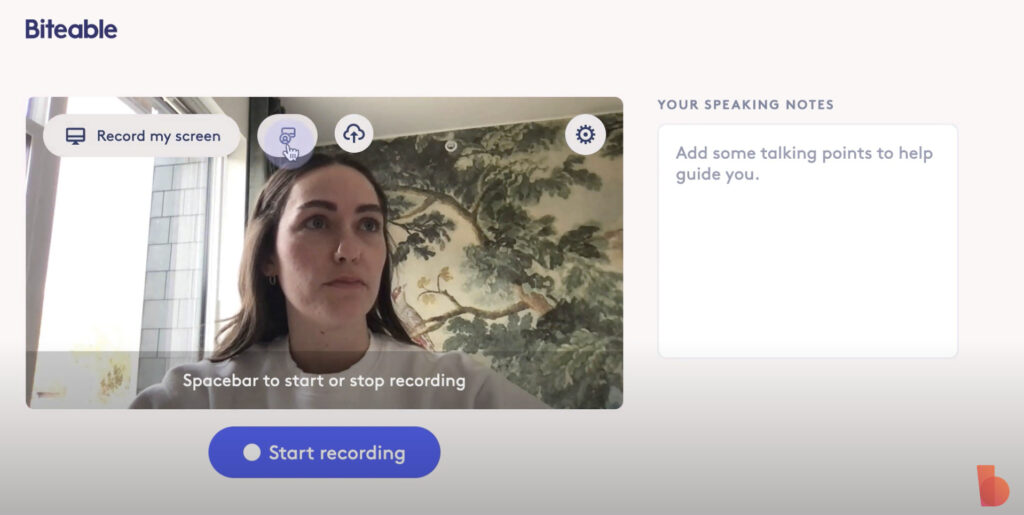
3. Both yourself and your screen will be recorded — you’ll show up in a circle at at the bottom of the video after you’ve finished recording.
How to screen record on Mac
Screen recording on your Mac is simple. You can do it with just your keyboard. Here’s how it goes:
1. Press Shift + Command + 5 to open the Mac OS screen capture toolbar.
2. Click Record Entire Screen or Record Selected Area, based on what you need to record.

If you decide to record a selected area, drag the edges of the bright area on your screen to set the section that you want to record.
3. Click the Options button.

4. Set your screen recording options from the dropdown menu. These options include:
- Save to: select where you want to save the video file.
- Timer: Set a 5 or 10 second countdown timer to start your recording, or choose no countdown timer.
- Microphone: Make sure you select the correct microphone. If you aren’t recording audio, you can choose no microphone.
- Show mouse clicks: If you need the audience to see where you click on the screen, mark the option to show mouse clicks.

5. Click Record. The screen recording bar will disappear and be replaced by a stop icon in the menu bar.
6. Once you’re finished recording, click the STOP icon in the menu bar.
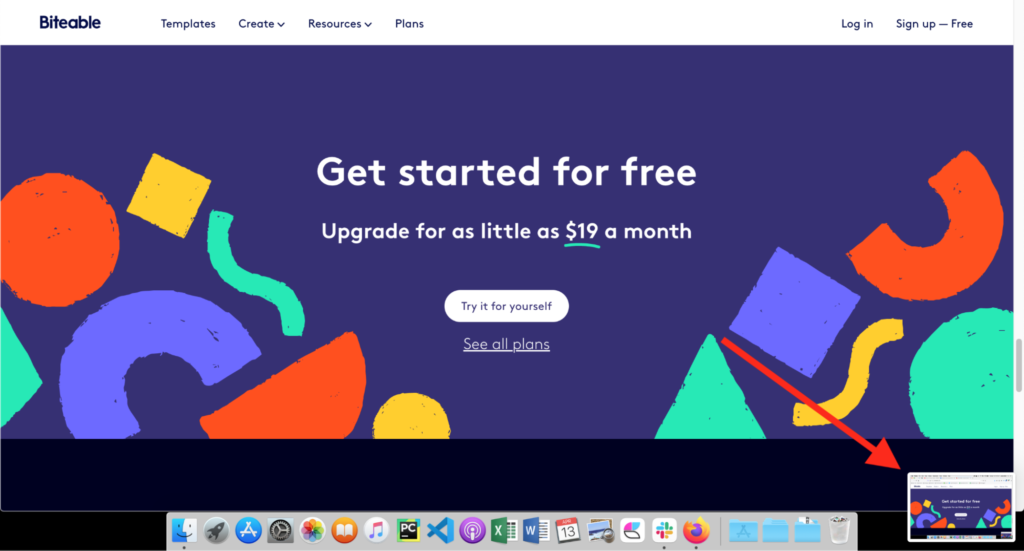
7. Click the thumbnail that appears in the lower right corner of your screen to open the newly created video clip in the Apple preview editor. You can do a little bit of customization in the preview editor, but it’s not a full-blown video editor.
8. Once you’re happy with your screen recording, click Done. The clip will automatically save to the selected destination.
Now you’ve got a screen recording video clip that you can upload and use in your favorite video maker.
Pro tip: Use Biteable to overlay text, maybe an animation or two, and you’ve just made a killer video presentation.
How to screen record on Windows
Like Mac, Windows also has a native screen recording tool, the Xbox Game Bar. It’s technically designed for recording games, but it works for recording almost everything. And it’s included with Windows 10.
Here’s how to set up and use the Xbox Game Bar for screen recording:
1. Navigate to the Settings menu.
2. Open the Gaming control panel.
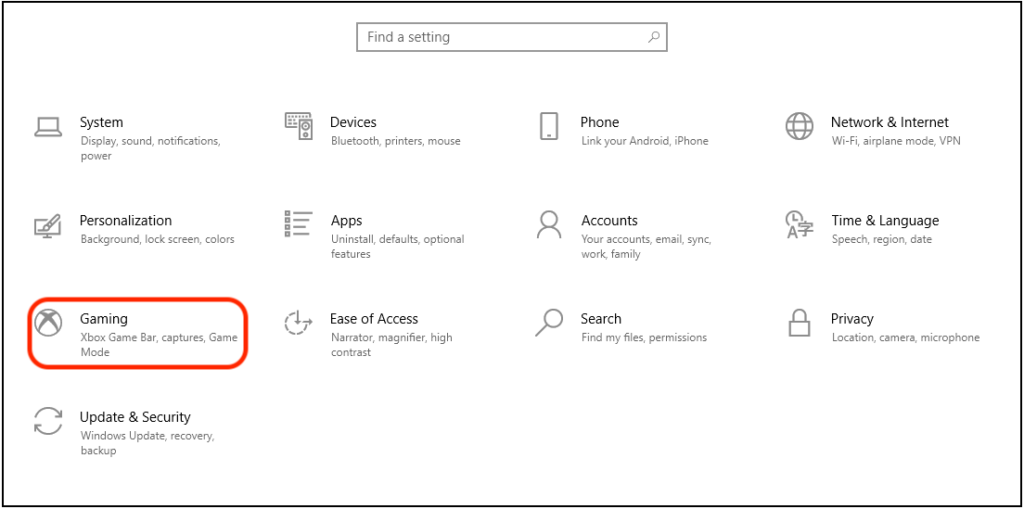
3. Click Xbox Game Bar option in the left side menu.
4. Toggle the switch under “Enable XBox Game Bar for things like recording game clips…” to On.

5. Go to the screen you want to record and press the Windows button + G to open the Game Bar.
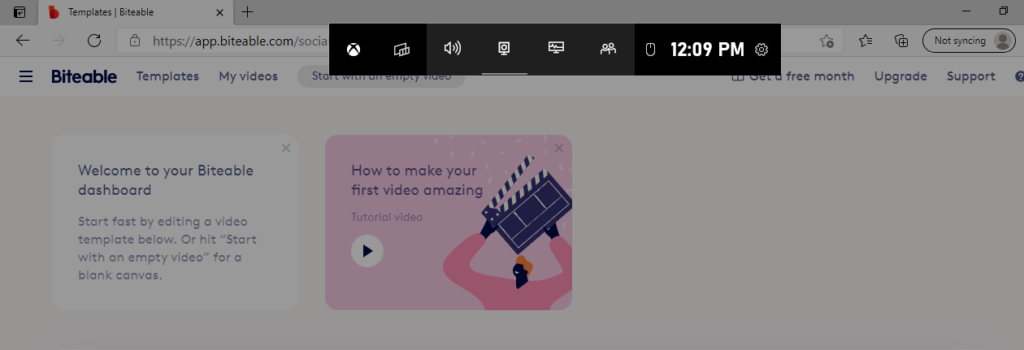
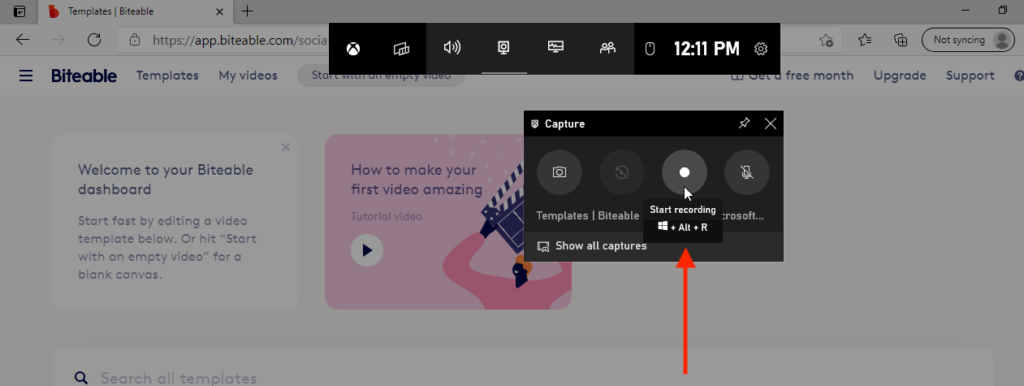
6. Select the capture icon to open the capture window.
You can adjust the audio settings in the Audio window. But the default settings should be okay as long as you’re not using any special audio equipment.
7. Click the Start Recording button or hit *windows + Alt + R to record your screen.
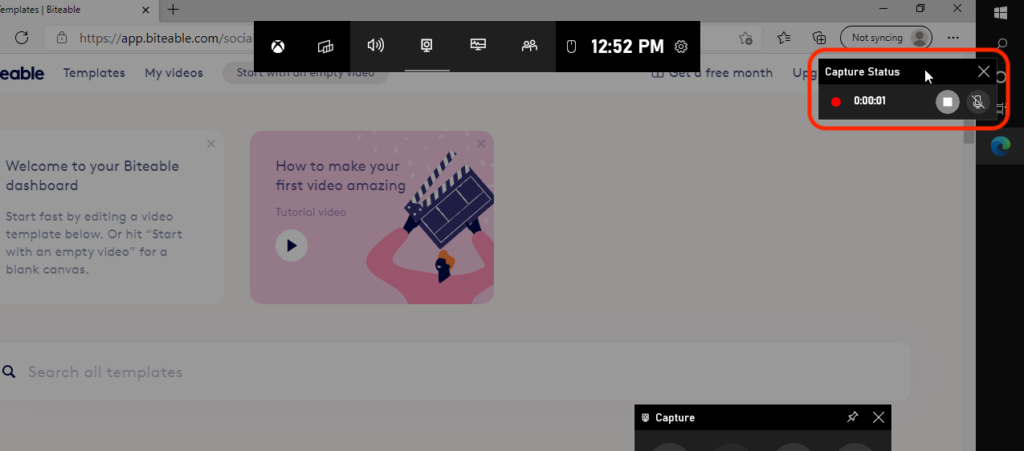
8. While you’re recording, the Game Bar windows will disappear. They get replaced by a small control bar in the upper right hand corner. Click the RECORD button to stop the recording when you’ve captured what you need.
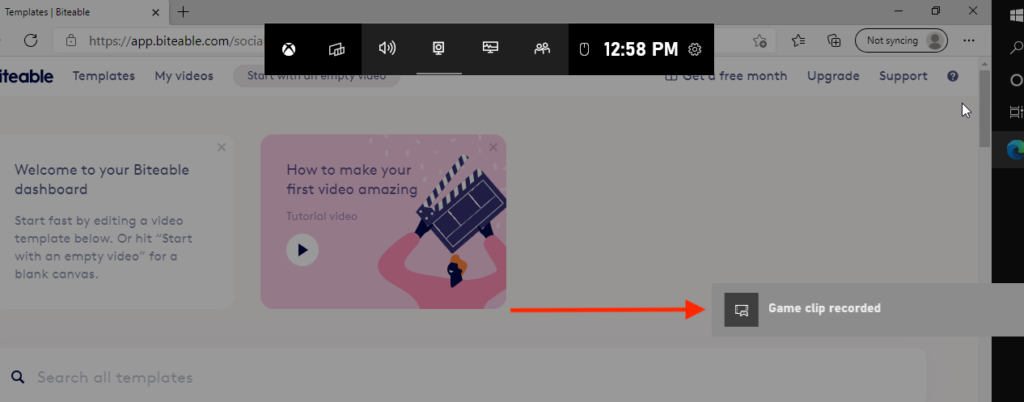
9. A widget will appear on the right side of your screen when you finish recording. Click the widget to open the file where Windows saved your screen recording. From there you can move the video file wherever you want or open the clip and edit it.
Pro tip: Need to convert your screen recording to a certain aspect ratio for a social media platform? Do it in a snap with Biteable’s video resizer tool.
How to record your screen on mobile
If you want to capture your mobile screen, you may need to use a third-party app, depending on what type of phone you have. But it can be done, even if you have a phone without native screen recording.
How to record your iPhone screen
Just like Mac OS, Apple includes a screen recording tool in the most recent version of iOS. However, the screen recording app is not enabled by default.
Here’s how to record your screen on an iPhone (this also works on your iPad!):
1. Open your Settings app.
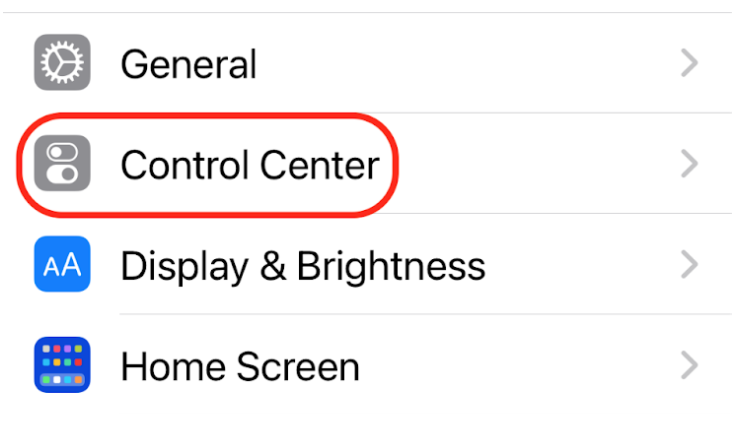
2. Go to the Control Center tab.
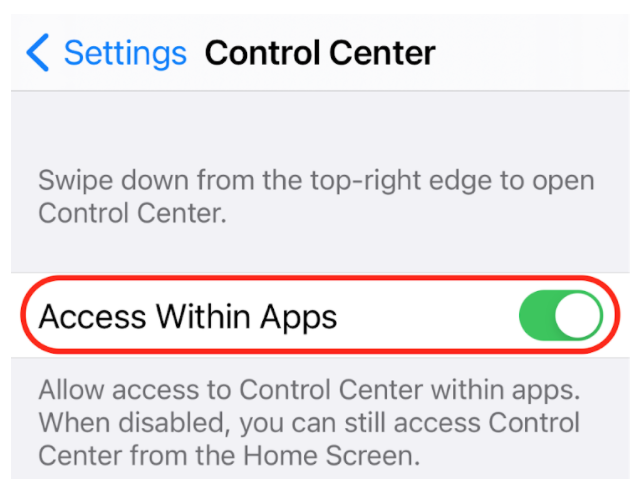
3. Make sure “Access Within Apps” is toggled to On.
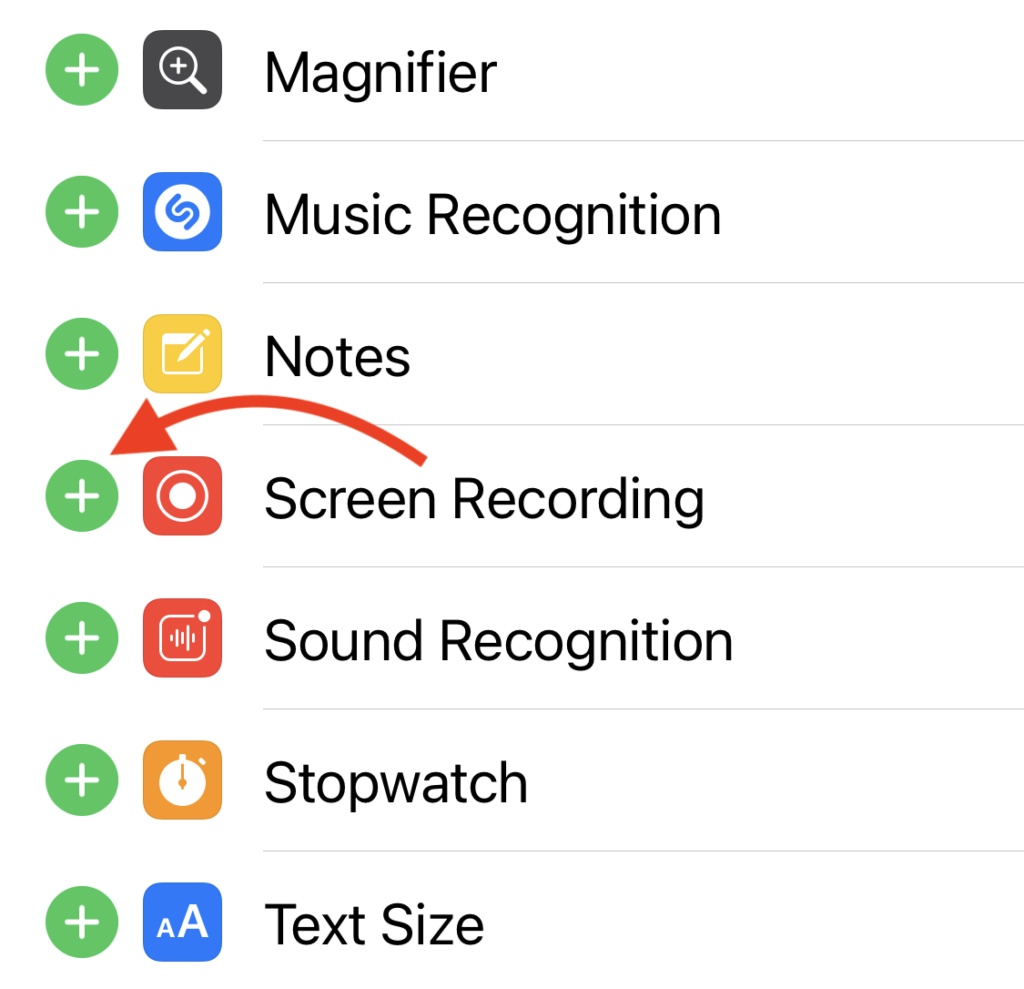
4. Tap the green plus sign next to Screen Recording to add it to your control center.
5. Open the app that you want to record, then head to the Control Center and tap the screen recording icon.
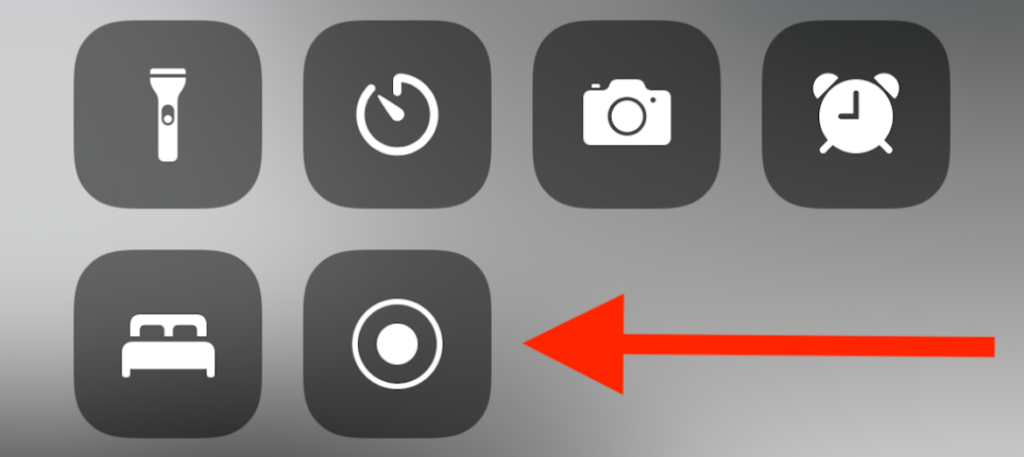
6. The screen recording controls will open.
You can select where you want to save the video file, and turn your microphone off if you don’t need to record audio.
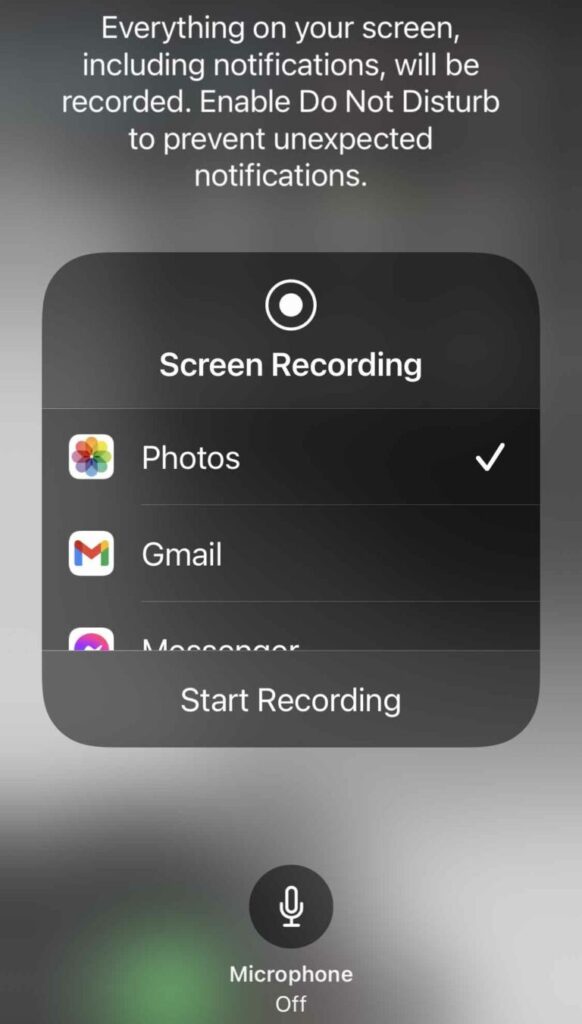
Tap Start Recording when you’re ready to record. You’ll see a countdown timer before the recording starts.

7. The screen recording tool will turn into a red timer icon in the upper left corner of your screen (upper right corner if you’re on an iPad). Tap the red icon when you need to stop recording. A dialog box will pop up to confirm that you want to stop recording.

Tap Stop to stop recording your screen.
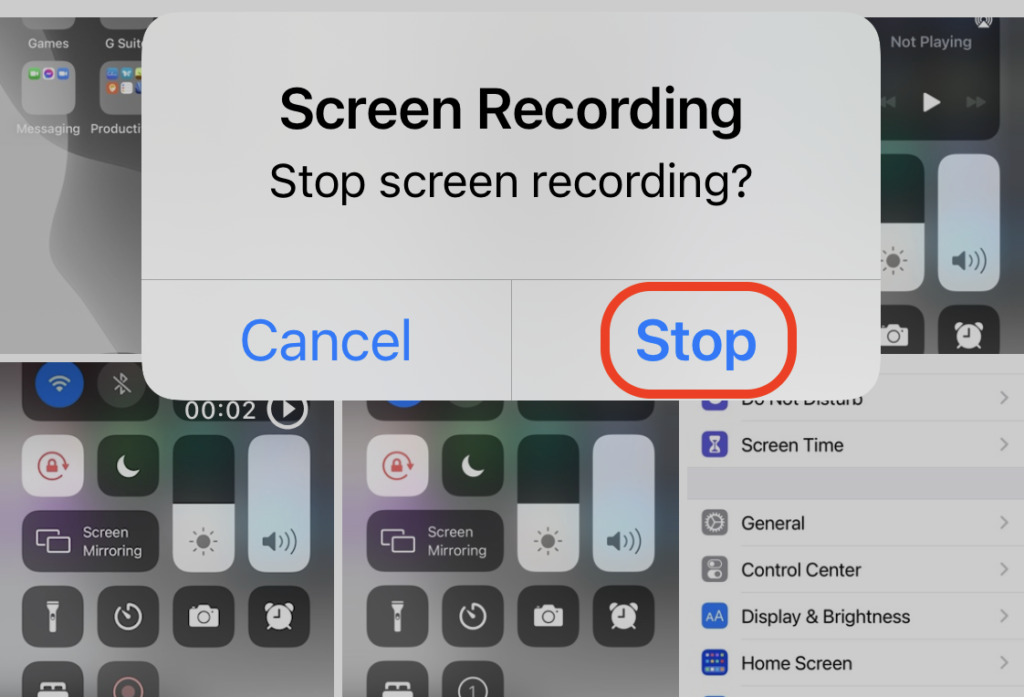
9. You’ll get a notification that tells you the recording has been saved.
You can find your screen recording video in your photos app. In the photos app, tap Edit to open the Apple video editor and make basic edits to your screen recording video. Once your video is ready, use the share function to export your video if you need to access it from your computer.
Pro tip: Merge multiple screen recordings into one seamless video with the Biteable video merger tool.
How to record your Android screen
Screen recording on Android is a bit complicated. But if you have a Samsung, LG, or OnePlus phone with Android 10, you can record your screen without any third party apps. If you don’t have a phone with native screen recording, there’s an app for that.
We’ll cover both ways, starting with how to record your screen on Android 10 with the built-in screen recording option.
Screen recording with the built-in Android screen recorder
This process may vary slightly from phone to phone. But all the basic steps are the same as long as your operating system isn’t heavily modified. (We used a Samsung S8 for this example.)
1. Swipe down from the top of your screen to access the notification shade.
2. Tap the screen recorder icon to grant access to record your screen.
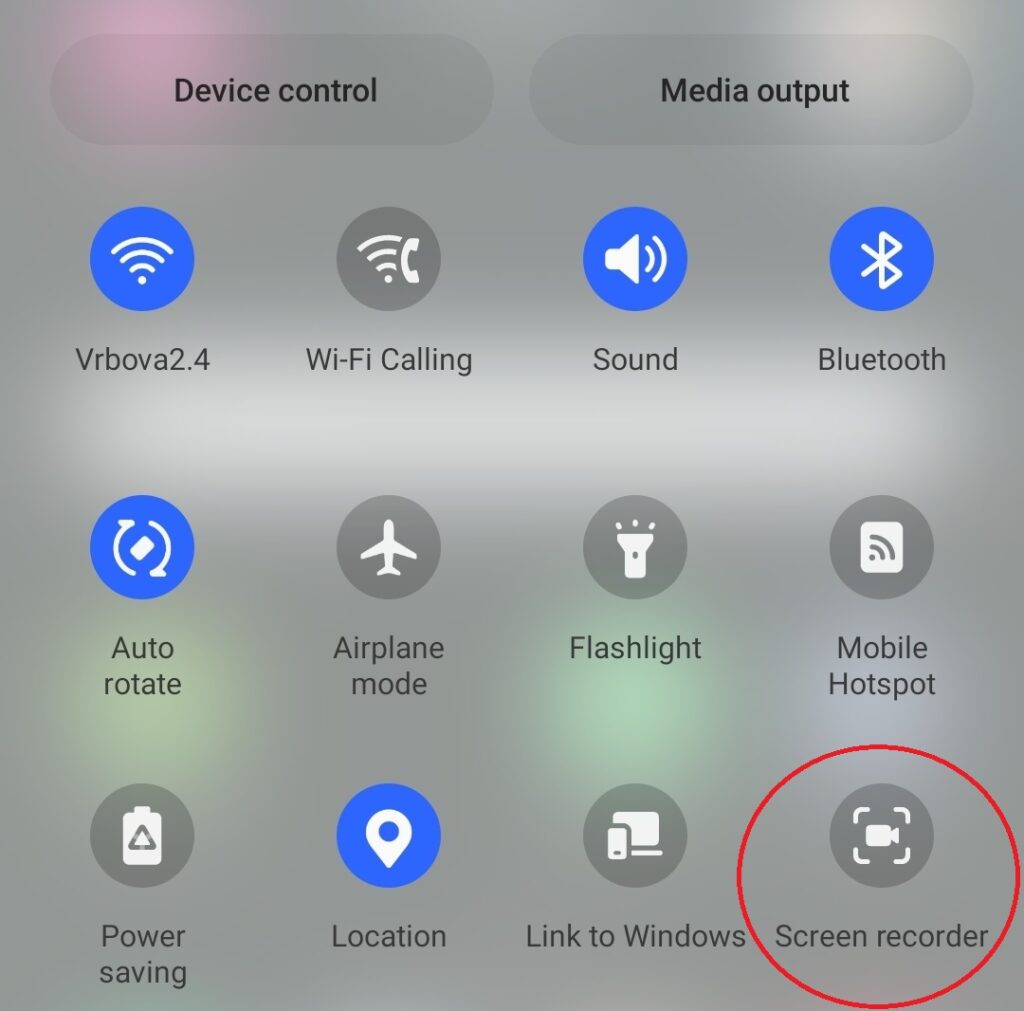
3. Tap Allow.
4. A screen recording dialogue box will pop up. This will have some screen recording options.
Most phones have sound configuration settings that allow you to turn your microphone on or off and enable the phone to record sounds from the apps you use during your screen recording.
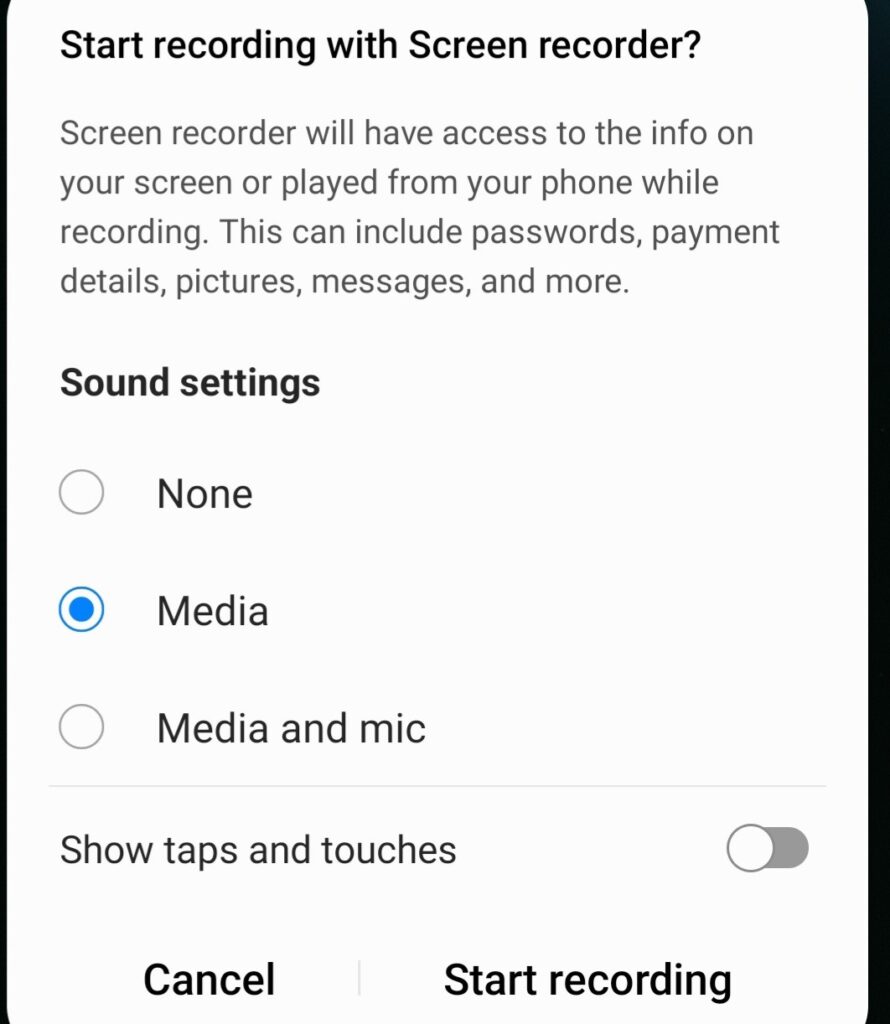
5. Click start recording. A countdown will appear, or tap skip count down.
A recording toolbar will appear near the top of the screen. When you’re finished recording, tap the STOP button.

6. On some phones, a dialogue box will pop up and prompt you to save the video to your phone photo gallery. On others, this happens automatically.
Screen recording with an Android screen recording app
There are several screen recording apps for those who don’t have an Android phone with native screen recording. AZ Screen Recorder is one of the best options because it’s free, simple, and stable.
Again, these steps may vary from phone to phone. But here’s the essential process using AZ Screen Recorder:
1. After you install the app, pull down the notification shade from the top of your screen. Tap the AZ Screen Recorder icon to give the app access to your camera and microphone.
2. Open the AZ Screen Recorder app.
3. Tap the red camera button to start recording.
4. A red camcorder button will appear at the edge of your screen (usually the right side). Tap the red camcorder button to pause or stop recording.
After you stop recording, the video is automatically saved to a gallery inside the AZ Screen Recorder app. You can open the saved recordings inside the app and export them to your phone’s photo gallery.
The app also has a ton of other customization options. But those are the basic steps to record your Android screen if you don’t have built-in screen recording. Also, most other screen recording apps use a similar user interface and screen recording process.
Pro tip: Using your screen recording for an office presentation? Learn how to make a high-quality business video in no time. Heading to the classroom? Making an educational video with Biteable is a snap as well.
Third-party screen recording tools
Recording your screen with a native screen recording tool is best, as long as it does what you need. However, there are some limits to built-in screen recording software.
In particular, the Xbox Game Bar in Windows won’t record your desktop, the file explorer, or the Windows weather app (the Apple screen recorder doesn’t have this limitation). If the Game Bar won’t record what you need, or if you’re using an older version of Windows, you’ll have to use a third party screen recorder.
There are plenty of screen recording software options available for Windows, but you don’t have to spend any money to get a good third-party screen recorder. Here are two free screen recorder apps that are quite capable.
Free Cam
Free Cam works in all the recent iterations of Windows, Windows 10, 8.1, and Windows 7. As the name suggests, it’s free. And it has none of the limitations of the Xbox Game Bar.
The recording process is simple. After you install the application:
1. Click the New Recording button.
2. Select the area of your screen or the window you want to record. You can also record your entire screen.
3. Click Record.
4. Press Escape when you’re finished recording.
5. Click Save as Video to save your video file.
Free Cam saves your recordings as 720p WMV files.
OBS
OBS (Open Broadcaster Software) might have more features than you need, because it’s designed for streaming. But OBS is free, and you can create screen recordings with a face overlay. (There are also several simpler tools for recording a face overlay, which we’ll go over next.)
Here’s how to use the core screen recording feature:
1. Click Start Recording in the control panel. The control panel is in the lower right corner by default, but you can move it.
2. Select the area of your screen that you want to record. OBS will record your entire screen (including OBS itself) by default.
3. Click Stop Recording when you’ve finished recording.
OBS saves your recording as an MP4 file. Because OBS records everything, including its own functions, make sure you trim off the beginning of your recording so your final video doesn’t include a clip of you setting up your screen.
OBS is powerful and has a lot of extras. It can be a bit intimidating. If you just need a quick, simple way to record your screen and the Xbox Game Bar won’t do the trick, Free Cam is the best option.
Pro tip: Turn a basic screen recording into a polished video in minutes. Upload your recording directly into Biteable and take advantage of easy-to-use editing tools like the video trimmer to give your screen recording that extra something-something.
Face overlay tools
If you’re recording your screen with a voiceover, your video is a lot more engaging when people can also see you talking. However, recording two videos, getting them in sync, then adding the video of you talking back onto your screen recording video is a lot of filming and editing work.
It’s much easier to just use a face overlay tool that records your webcam and overlays it on your screen recording as you record. That way you can record everything in one take, without the editing headache.
These are the best face overlay tools.
Loom
Loom is the most popular face overlay tool. It’s easy to use, and there’s a Loom Chrome extension that enables you to control Loom from your browser.
All you have to do is get your camera lined up and hit record. Once you stop recording, it automatically saves your video. Loom also shows you your face while you record, so you can see how your video will look in real time.
It’s a handy screen recording tool. However, the free version limits your video length to five minutes. Upgrade to the business plan to get unlimited video length.
CloudApp
CloudApp is almost the same as Loom, but it comes with more capable video sharing for sending videos to your team. CloudApp is the most straightforward replacement if you don’t want to use Loom.
That’s a wrap
That’s all you need to know to get screen recordings from all your devices.
All that’s left now is to add some animated text and visual effects to your screen recording videos with Biteable. Then you’ll be ready to embed your videos in emails, post them to social media, or share them with your team.
