Video is an amazing way to deliver information. And in many cases, adding a voice over to your video makes a lot of sense, especially in a business setting. Voice overs add that extra human touch without having to actually record footage.
But understanding how to do voice over (and do it well) takes practice.
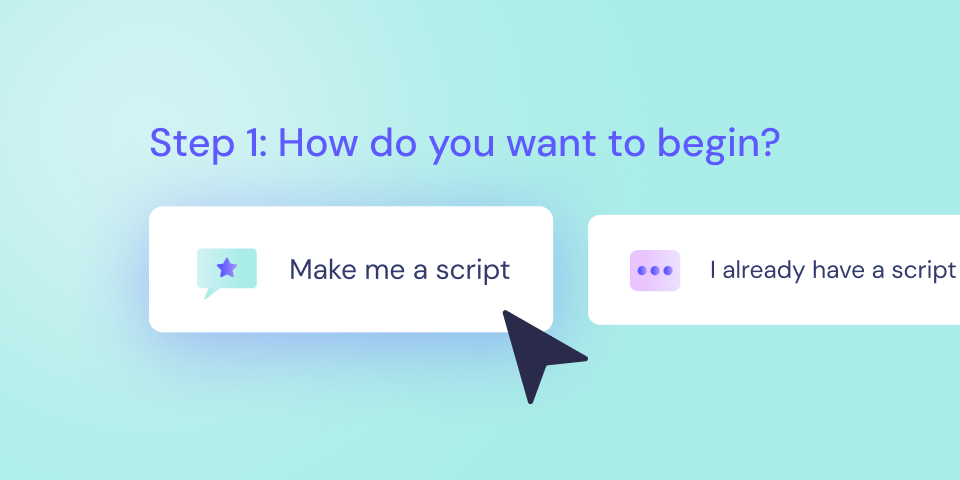
In this guide to DIY voice overs, you’ll learn about:
- Writing a voice over script
- Choosing the right equipment
- Tips for recording your voice over
- Syncing voice over to a video
- A shortcut using an all-in-one app
Create videos that drive action
Activate your audience with impactful, on-brand videos. Create them simply and collaboratively with Biteable.
Is there an app to do voice overs?
Wait – do I really have to do it all myself? There’s an app for everything these days. Isn’t there an app to do voice overs the easy way?
Yes, there is. We’ll get to that in a minute.
If you’re a budding audiophile, you might want to do your voice overs using a fully manual approach using more complex video editing software. But for most people (especially those who just want to add a voice over to an internal comms video) choosing an online video maker that supports voice over is the best option.
With an all-in-one online video maker like Biteable, you can easily add a voice over to any of your videos without any complicated editing. The app does all the heavy lifting for you.
This guide goes over the general steps for doing a voice over using video editing software. Or skip ahead to the end to learn how to do voice over the easy way in Biteable’s all-in-one app.
What is a voice over and when should I use it?
A voice over (AKA a voice over recording) is a recording of a person speaking during a video when that person isn’t seen on screen. Voice over is used to explain or give greater context to what is shown on screen.
Adding a voice over is a good option when:
- You have video footage that needs more context
- You’re explaining complex topics (ie: not easily summed up in on-screen text)
- You want to humanize a sensitive subject
- You want to try something new for your internal comms videos
Recording a good voice over: Best practices
Thanks to affordable, high-quality microphones and all-in-one video making apps, adding a voice over to a video is a lot easier than it used to be. But there are a few common mistakes newcomers often make.
Follow these best practices to record a good voice over:
Write a script
It might be tempting to write a loose outline and fill in the details on the fly. People tend to think the best way to make dialogue or a monologue sound natural is to come up with it in real time, just as you would during a real conversation.
But this isn’t the case, especially for voice over. When you speak into a microphone instead of to another person, it’s not nearly as easy to think of the right thing to say on the spot.
Write out a word-for-word script that you can follow when you do your voice over. You can always make minor tweaks to it during recording. But you’ll end up with a much better voice over if you have a solid script before you get in front of the microphone.
Choose a microphone and noise reduction device
Most people haven’t seen a professional voice actor record a voice over. It takes more equipment than you might think to produce a clean, clear sound.
The microphone on a smartphone is pretty good, but the noise reduction devices on a phone are limited because of their size. If you just use your smartphone as is, you’ll sound like you’re recording on speakerphone.
Fortunately, you can make a noise reduction filter with socks. The key is to have at least two layers of cloth protecting your microphone. It might feel strange to put a doubled-up sock on your phone, but you’re only recording voice. There’s no need to look cool.
Alternatively, AirPods and other earbud headphones produce impressively clear voice over recordings, better than your phone’s built-in microphone. Or you can get an external microphone that produces clean recorded voice over for around $30.
If your external mic picks up too much ambient noise or speech pop, you can throw a couple of socks over it as well.
Record in a small room
You already know that you need an empty room without open doors or windows. However, it’s also best if you record in a small room. Larger rooms produce more echo. If you’ve ever been in an empty gym, you know what we’re talking about.
If you record in a room that’s too large, this echo can overpower your noise reduction equipment (especially if you’re using a DIY noise filter made of socks).
You don’t have to record in your closet (although that’s not a bad option.) But choose the smallest room available.
Watch your video while you do your voice over recording
If possible, watch your video while you do your voice over recording. That way you know exactly how fast to speak to keep your voice over synchronized with your video.
It’s okay if your voice over doesn’t match up exactly with your video or if you have minor mistakes. You can edit the audio recording to make it fit. But you can only do so much during the editing process. And the more editing you do, the more time it takes to make your voice over video.
Alternatively, you can record a separate audio clip for each scene. This method complicates the logistics of saving and uploading your files if you’re doing a voice over using the DIY manual option (more on that below). But it does make it easier to get your audio lined up with the video in your video editor.
No matter how many audio files you use, watch your video while you record to cut down on editing time and ensure you don’t have to go back and record your voice over again.
Speak naturally (or rewrite your script)
It’s not easy to sound natural when you’re sticking to a script. The key is to sound like you’re speaking rather than reading.
Imagine you’re speaking face-to-face with a person, and make the facial expressions that you would make in a real conversation. This helps you sound more natural as you read your script.
If you find that you just can’t speak naturally when you read your script, you may need to rewrite some or all of it. Another challenge of recording a voiceover is writing a script that sounds natural. People tend to write differently than they speak, so it might take a few tries to get it right.
Speech-to-text software can help you write a script that sounds natural when you read it. Just say what you need to say, then clean up the text a little bit to clarify things and remove anything unnecessary. It’s a quick way to get a script that’s written to be spoken, even if you’re not great at writing.
How to add a voice over to your video
Now that you have a few best practices in mind, it’s time to add your voice over to your video.
You’ll need to record your voice over with separate audio recording software then add it into your video editing program and sync the audio to your video. The process varies slightly depending on the video editor you choose, but the basic steps are the same.
1. Choose audio recording software
Most smartphones have a default voice recording app, but these apps are designed for recording quick voice memos. They usually lack the sound monitoring and audio editing capabilities needed for a voiceover.
Even the free version of a professional voice recorder gives you more control over your recording and better editing capabilities. Audacity, TechSmith Audiate, Podcastle are good, free voice recorders.
2. Monitor your audio levels
Keep an eye on your audio levels when you add your voice over, especially manually. Without getting into the weeds of how sound levels are measured, it’s best if your voice over sound levels stay between -10 and -20 decibels, with an average near -6. Your sound levels should never go above 0 decibels.
If you find your average sound levels consistently peaking above -6 decibels, you may need to move your microphone further away from your mouth or record in a smaller room. If you can’t record in a smaller room, try reinforcing your noise reduction equipment so your mic doesn’t pick up as much ambient noise.
3. Edit your voice over and export the audio file
If you recorded your voice over in an audio editor, you should be able to edit the audio in the same program.
At this stage, it’s best to leave any audio silence at the beginning and end of your voice over. You can even leave some extended silence in the middle. That way you have some padding to trim your voice over and get it matched up with your video later on. Right now, you’re mostly looking to edit out any mistakes in the audio.
Once your voice over is cleaned up, export it as an audio file.
4. Import your voice over audio into your video editing software
Importing your voice over into your video editing software is the same as uploading a soundtrack. The buttons may be in different places depending on the software, but it is all essentially the same process.
Choose the soundtrack option, but instead of adding music, select your voice over audio file. If you recorded a snippet for each scene, remember to upload all of your voice over audio files.

That’s it. Your voice over shows as the soundtrack for your video.
5. Sync your voice over with your video
Once the audio file is uploaded, you’ll finally be able to hear how it lines up with your video. Admittedly, this is one of the most frustrating parts of the DIY system.
It’s common for voice over audio to be out of line with the scenes of a video on first pass. If your voice over doesn’t line up, go back to your audio editing software and do a bit more trimming to get things right. Then, export the audio file and give it another go in your video editing program.
A word of caution: before you head back to your audio editing software, take note of the timestamps where your voice over needs to be trimmed. Otherwise it’ll be nearly impossible to make the proper adjustments. Keep checking and editing until your voice over is just right.
6. Check your video
The last step is to preview your video to make sure that everything lines up properly between your voice over audio and the video itself. If it looks good and sounds good, send your video into the world to do its magic.
If doing a voice over manually sounds daunting, consider using an all-in-one video making app like Biteable instead.
How to do a voice over with Biteable
Biteable streamlines the process of adding a voice over to your video. Here’s how to do a voice over with Biteable.
Head to your Biteable account
Or sign up here. Once you’re in Biteable, create or open a video project
Select the Advanced Editor tab
Click on the microphone icon in your video timeline
In your timeline, you’ll see two audio layers, one for music and one for voice over. Click on the microphone icon for voice over.
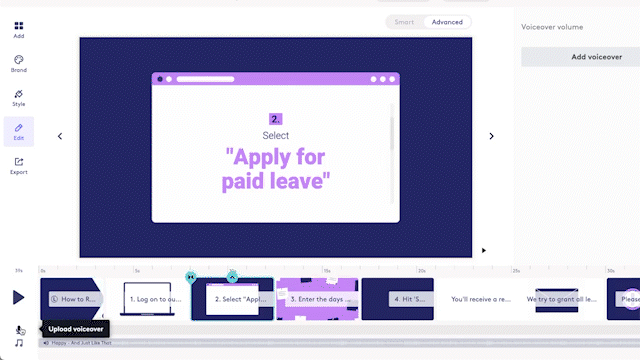
Upload your voice over
Select “upload voice over” to add a previously recorded voice over from your computer or choose from a list of previous uploads in your Biteable account.
Easily trim and position your voice over
Use Biteable’s intuitive tools to easily fine-tune your voice over.
Adjust the slider on your video timeline to position your voice over. Use the voice over panel to the right of the timeline to:
- Quickly delete or replace a clip
- Add a fade in or fade out to your audio clips
- Adjust the overall volume of the audio

Voice over FAQs
Answers to all your burning questions about how to do a voice over and how to add voice overs to your video.
Why is a good voice over important?
A good voice over is extremely important because the quality of your voice over can make or break your video. A high-quality voice over adds a layer of professionalism, as well as greater depth, context, and a personal touch. A poor-quality voice over has the opposite effect; it makes your video seem sloppy and rushed.
How do you do a beginner voice over?
To do a beginner voice over, follow these best practices:
- Write a word-for-word script
- Speak as naturally as possible
- Use speech-to-text software to help write a natural-sounding script
- Use an all-in-one video making app to add your voice over to your video
How do I do voice over at home?
To do a voice over at home, pay attention to these quality tips:
- Use a good quality microphone or
- Reduce background noise by putting socks over your smartphone
- Record with all windows and doors closed
- Choose a small room to record in
How do you do a voice over on Google slides?
Adding a voice over to Google slides is the same as adding any audio clip.
- Open the correct slide
- Click insert > audio
- Select the audio file from your computer
- Preview using the icon of a speaker that appears on the slide
- Use the format options tab to choose how your voice over plays.
How do you do a voice over on PowerPoint?
To do a voice over on PowerPoint:
- Open your presentation
- Choose insert in the top toolbar
- Select audio on the right hand side
- Choose audio on my PC to upload a file OR
- Choose record audio to record a new voice over
Another option for making your presentation more engaging is to embed a video in your PowerPoint.
Create video magic with Biteable
Whether you’re adding a voice over, making an animated video, or some wonderful combination of the two, Biteable has you covered.
Biteable’s leading video making software is an easy way to make videos online — no experience necessary. Choose from hundreds of brandable templates, workplace-ready video scenes, and unique animations to create a video masterpiece in minutes.
Use Biteable’s brand builder to fetch your company colors and logo from the web and automatically add them to your entire video. Take advantage of a collaborative workflow your entire team can get behind. Share your video with a single, trackable link and watch the magic happen.