Using video on social media is an excellent way to make announcements, run promotions, and remind your customers about your great products or services.
Whether you’re a small business owner, digital marketer, or content producer, keeping your social media audience up-to-date is hard enough with text and photos.
However, the majority of marketing professionals worldwide name video as the type of content with the best ROI, so it makes good sense to start posting videos. But can you spare the time to make them? Now you’ve discovered the Biteable online video editor, you can!
In this article, we’re going to show you how to make a video, then share it effectively via social media, focusing on Facebook and Twitter.
1. Use a great title
Grabbing people’s attention with the title is very important. Some ideas to help make great titles:
- Provoke curiosity
- Offer a benefit
- Be descriptive
- Use powerful adjectives
2. Keep it short
Social media feeds can be noisy these days, so it’s a good idea to keep your video short and snappy. Less than a minute is a good rule of thumb. Less than 30 seconds is even better. If you can trim it down to 15 seconds, you’re a genius! Biteable video scenes are around 5 seconds each, so keep that in mind as you make your video.
3. Include a call to action at the end
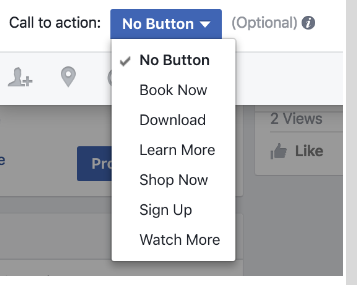
At the end of your video, tell the viewer what you want their next action to be, something like “call us on this number” or “visit our website today”. If you’re uploading your video to Facebook, you can create a call-to-action button which can incorporate other Facebook functionality or a direct link to website.

4. Don’t make it a sales pitch
It’s important to create something people want to see. Social media users are there for entertainment and will keep scrolling if something isn’t fun or useful. Focus on adding value. Here are some examples of how to add usefulness or interest to your video:
- Answer common questions about your business
- Show them how to do something or get something for free
- Provide a case study or a testimonial
- Tell an engaging story that relates to how real customers use your products or services
Here are a couple of case studies we’ve done at Biteable that show how clever users get even more value from their Biteable Subscriptions:
5. Add a custom thumbnail
A custom thumbnail is the image that displays when the video has not auto-played and the viewer needs to press the play button. Typically, it also displays when the video has stopped.
Not all social networks will allow you to do this, but if you can add a custom thumbnail, you should. Pick the frame of your video you think sums the video up best and will encourage viewers to click play. Or, even better, if you have the skills, create your own with Photoshop, Canva, or something similar.
On YouTube, you can select a custom thumbnail from three randomly selected options or you can upload your own.
On Facebook, this feature is really powerful. For a 25 second video it will provide 10 different custom thumbnails to choose from, plus the option to upload your own.
We highly recommend making your own if you can. Here’s our guide on how to do it.
6. Make multiple versions of your video
Biteable allows you to duplicate your videos, so you can easily make a template of your social media video and then push out variants quickly for multiple campaigns.
7. Beware the Twitter trim
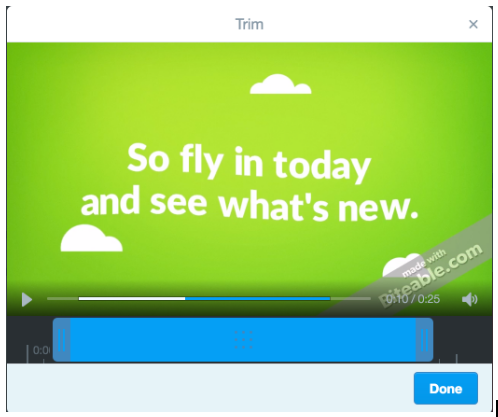
When you upload your Biteable video to Twitter, it’ll try to trim the start and end of your video, but never fear, simply adjust the beginning and end sliders at the bottom of the upload window before you click Done.

8. Native videos are the new black
Uploading a video file directly from your computer to Facebook or Twitter is what’s known as ‘native video’, and Twitter and Facebook algorithms give precedence to native video. So although you can always share a link to your video, it’s best to download your video and go native if possible.
If you’re interested in learning more, there are lots of Biteable tutorials and tips on our blog, but here are a couple of great ones to get you started.


